Initial training is often the part every English instructor dreads the most. Looking back, this was probably my most stressful experience being here in Korea. Not because of the workload, but because of the nerves that came with moving to a foreign country. I was worried about taking the wrong bus/subway, getting lost, and oversleeping because of jet lag. Thankfully, everything worked out just fine for me & I was able to create some great friendships from this week alone.
Asking For Help!
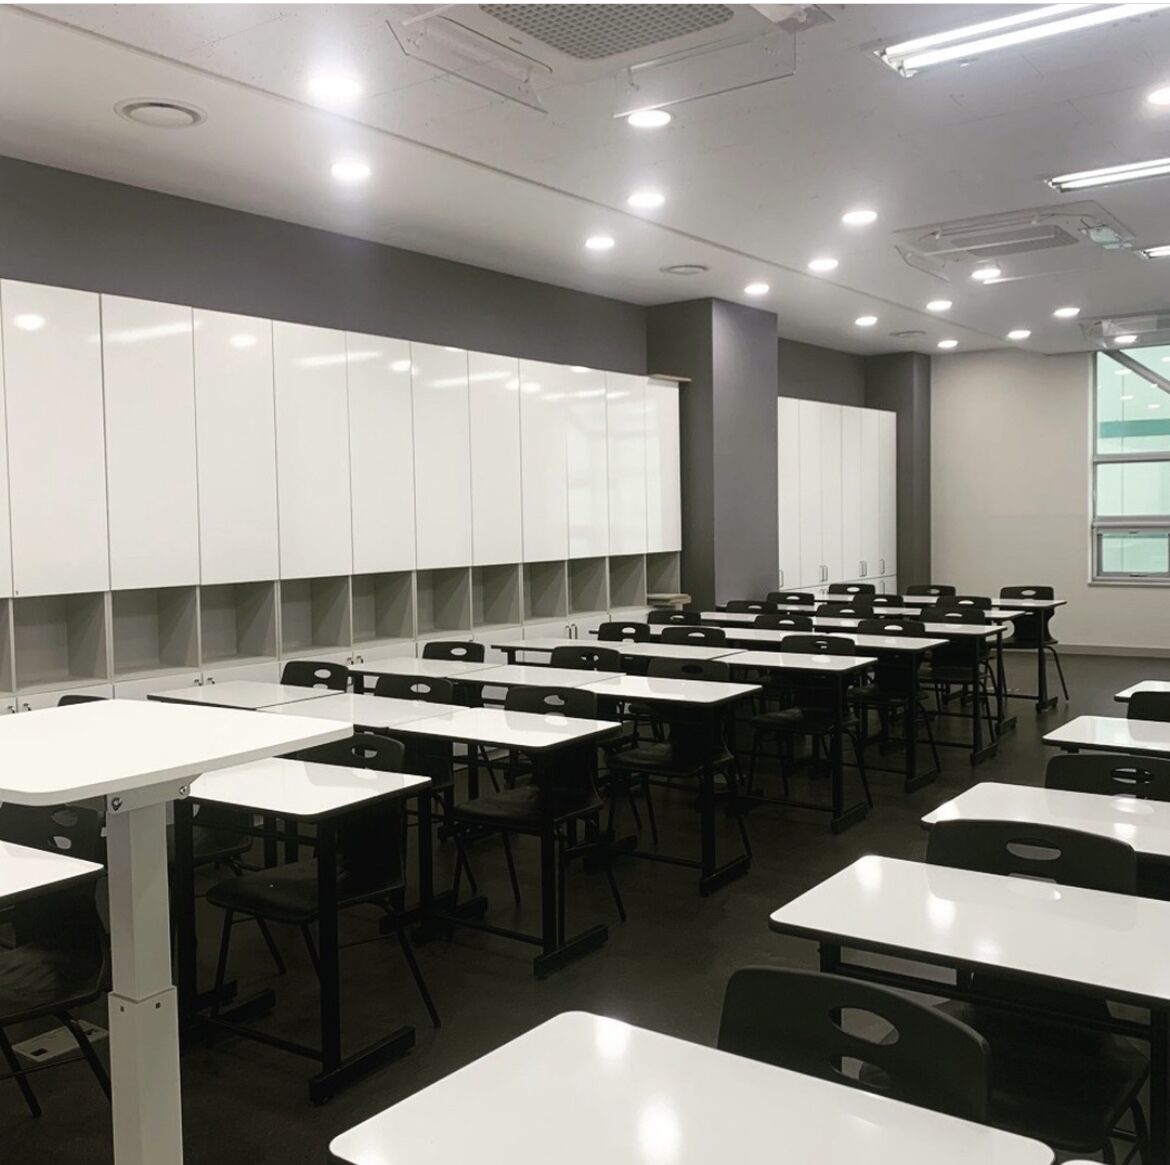
My training center was located in Dongjak-Gu, which was about a 30-minute commute from my airbnb. My first day of training I managed to hop on three wrong buses. I think I could’ve prevented this, but I am so stubborn when it comes to asking for help. If there is anything you get from this post, it’s that you should ask for help if you are unsure about anything. I eventually made my way to the training center where I met other fellow trainees and our instructor.
Schedule
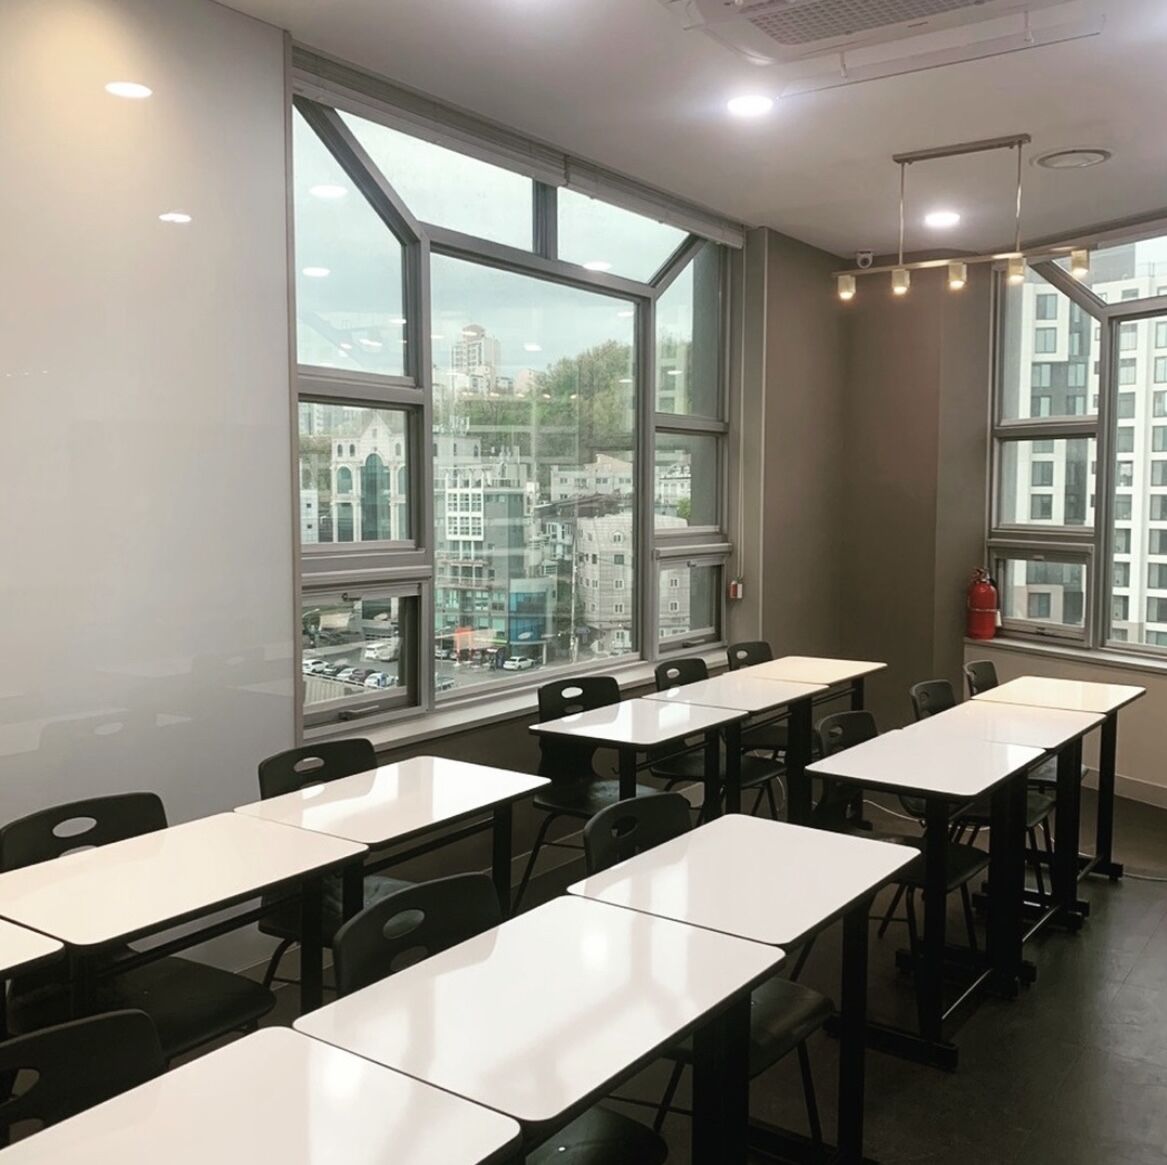
Training was from 10 am to 5 pm. From 10am-12pm, we were given lessons on how to teach the course materials. The lessons consisted of reading comprehension, listening, and student management. All three subjects play a vital role in my current lessons, so shout out to Charles Hong for being a great patient instructor.
Golden Hour
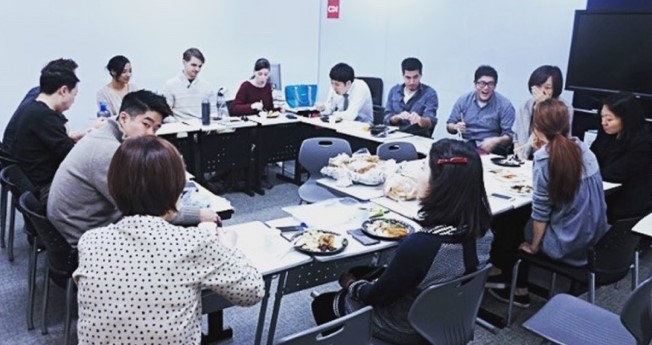
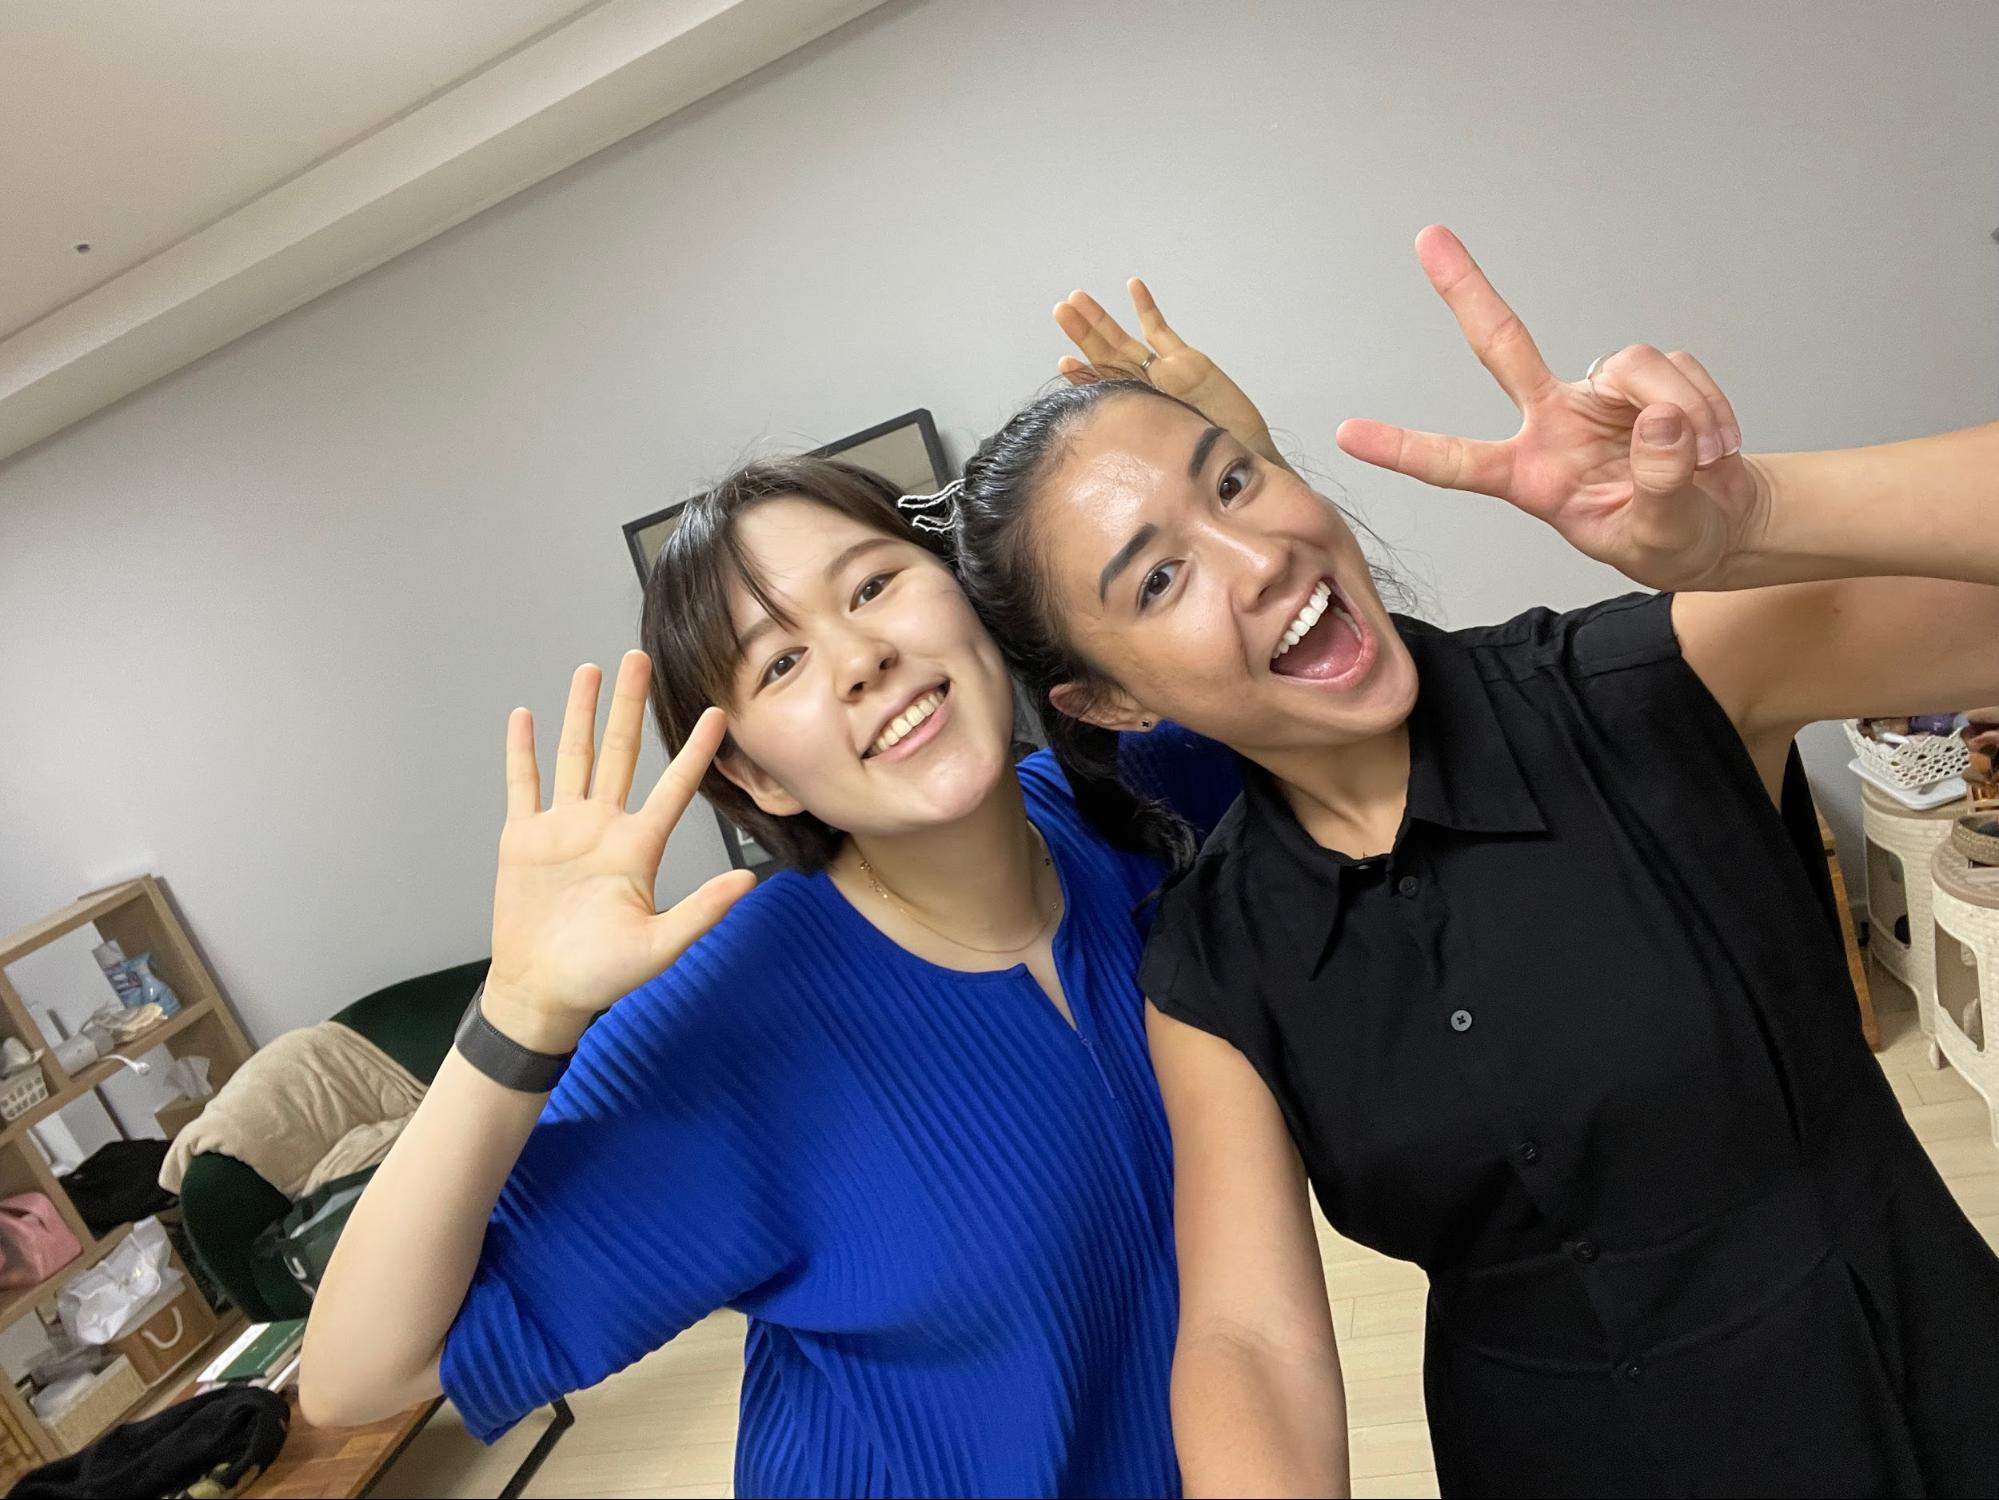
Lunch was from 12pm-1pm. These breaks allowed us trainees to bond, share information, encourage one another, and talk about our new experiences here in South Korea. It was comforting to know that everyone was just as nervous, scared, and excited as me. We instantly clicked with one another and exchanged socials. We were from all different backgrounds, but the fact that we shared the same dreams and goals in that moment made the moment all the more special.
Mock Training
From 1pm-5pm, trainees utilized this time to practice mocks. Mocks are basically practice runs. They allow us to pretend that we are teaching a classroom full of students. We ran through the lessons just as we were taught and gave each other feedback on how we performed. In all honesty, it was a bit intimidating to mock in front of one another. But, with each run it became easier. We would perform our mocks the following day in front of our instructor Charles. He graded our level of confidence, our ability to comprehend instructions, our ability to keep conversations flowing, our student management skills, etc.. Most of us improved day by day.
Ready to Rock and Roll!
The fifth day was our final mock day. This is where we performed our mocks one last time and were given the green or red flag to proceed with our position at Creverse. Everyone in my group, including myself, passed. In a nutshell, training week will be a very overwhelming week. But, if I did it, so can you. Best of luck!
Amber Ochoa is from Los Angeles, USA, and just recently moved to South Korea in May. She studied Biochemistry as an undergraduate. After graduation, she began venturing out and embracing her love for adventure. She finds that “nothing holds greater power in our life than the unknown.” One night while applying to random jobs on Indeed, she came across an English teaching position in Seoul, Korea. Flash forward, she is now teaching at CDI, Mokdong branch. She claims that Creverse found her and ended up becoming a blessing in disguise. Amber says giving knowledge to students & inspiring them for higher achievements in life is one of the greatest feelings in the world.
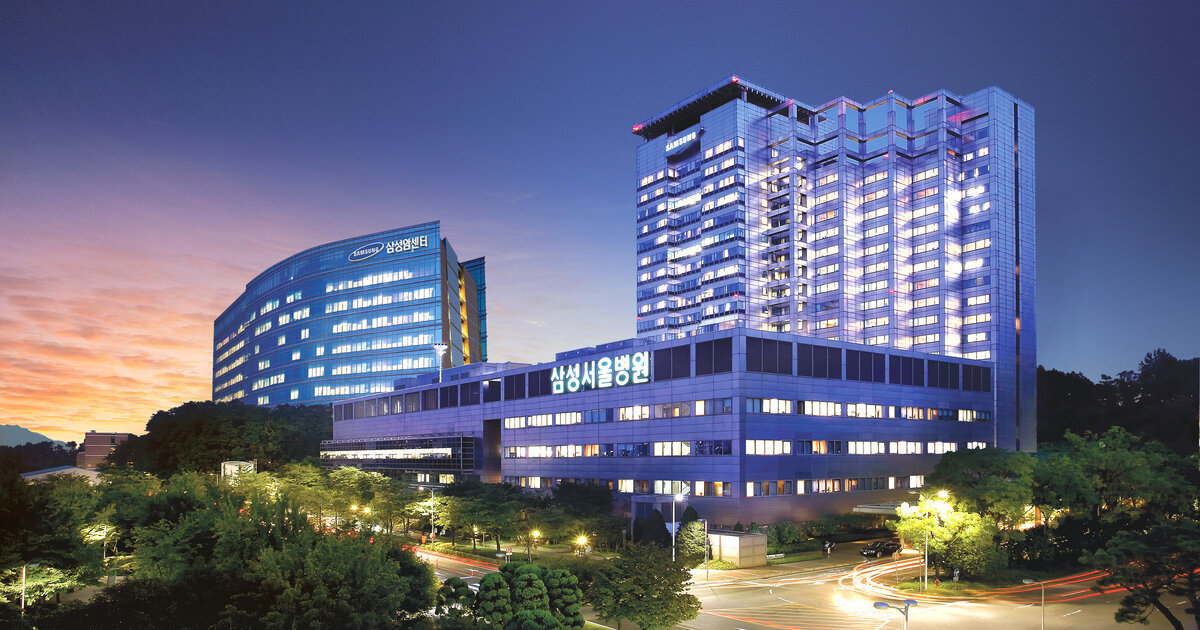
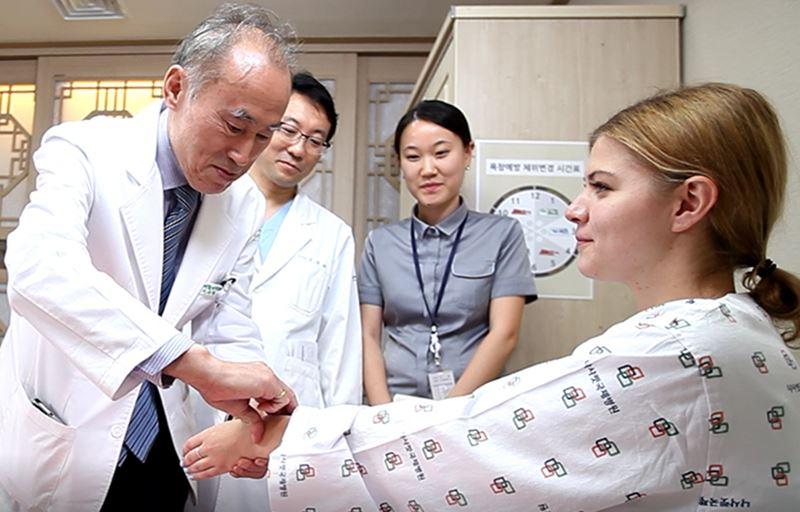
South Korea stands as a top choice for English teachers, thanks to its rich culture, vibrant cities, and welcoming locals. Worried about Korean healthcare? No need! Satisfaction of healthcare has been consistently among the highest in the world – South Korea was rated as the second most efficient healthcare system by Bloomberg.
Healthcare System Overview
The Korean Healthcare system offers affordability and quality care to both natives and foreigners alike. When you teach in South Korea, you actively enroll in the National Health Insurance System. This reduces medical costs, making routine doctor visits economical. While not all English language institutes in Korea provide insurance for its teachers, some like CREVERSE provide full coverage through national healthcare insurance! The cost is roughly 7% of gross salary. About 3.5% of salary is deducted from your gross monthly pay, and the other half is covered by the school! (These are the same exact rates for Native Koreans.)
Hospitalization Costs
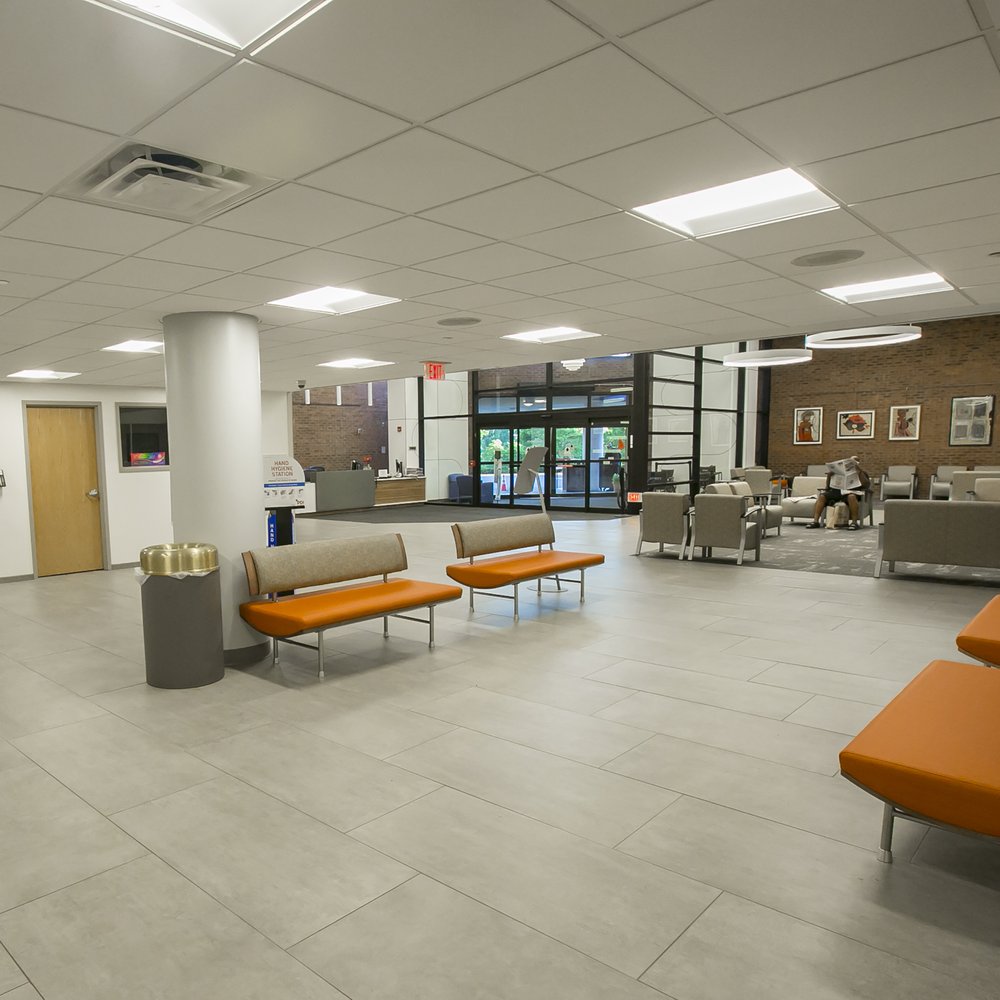
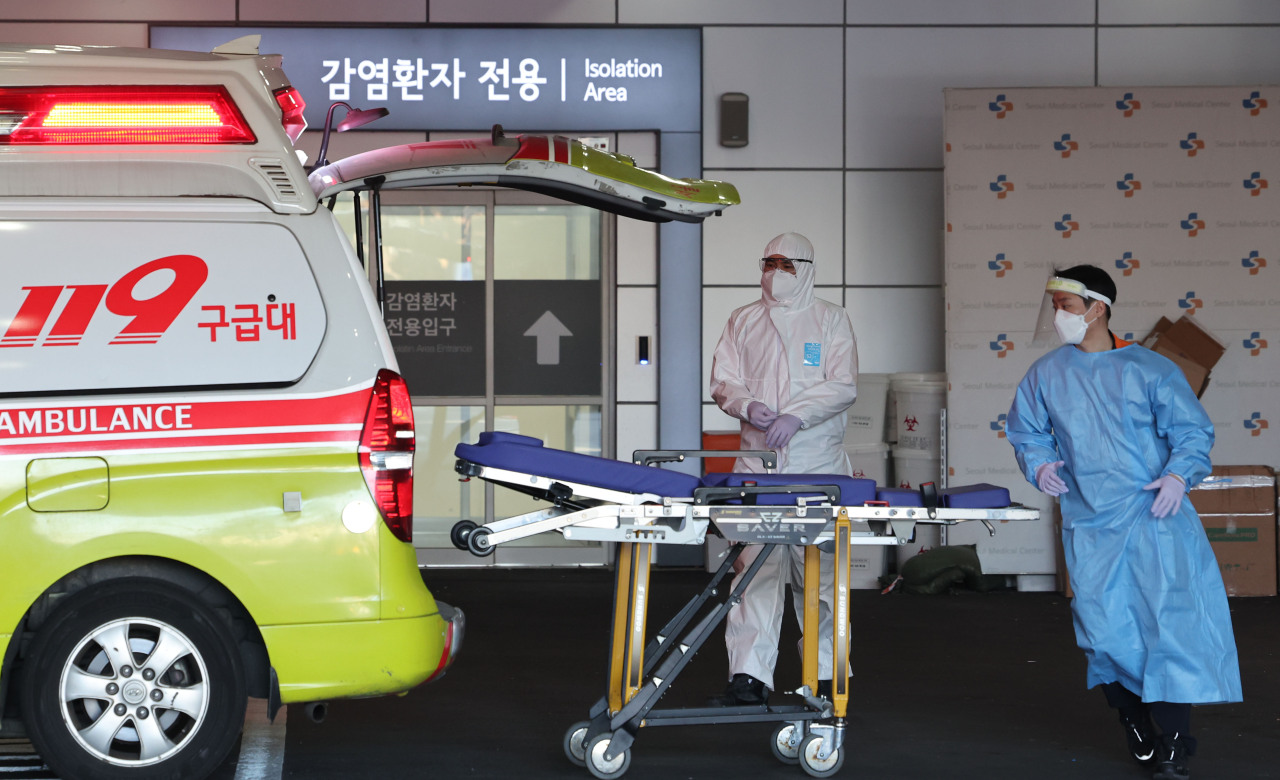
While there may be some hospitalization expenses, insurance actively eases the financial burden during unforeseen medical emergencies. While this cost can sometimes be substantial, the presence of insurance ensures that you don’t have to shoulder the entire expense on your own. This Korean healthcare system provides a safety net that’s especially crucial during unexpected medical situations.
Quality of Care
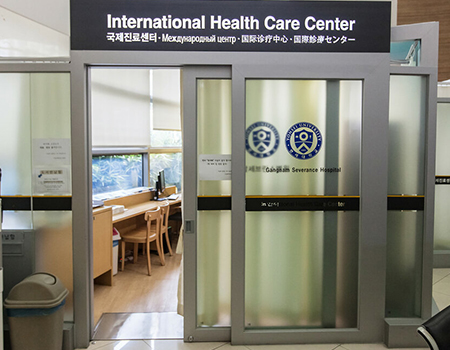
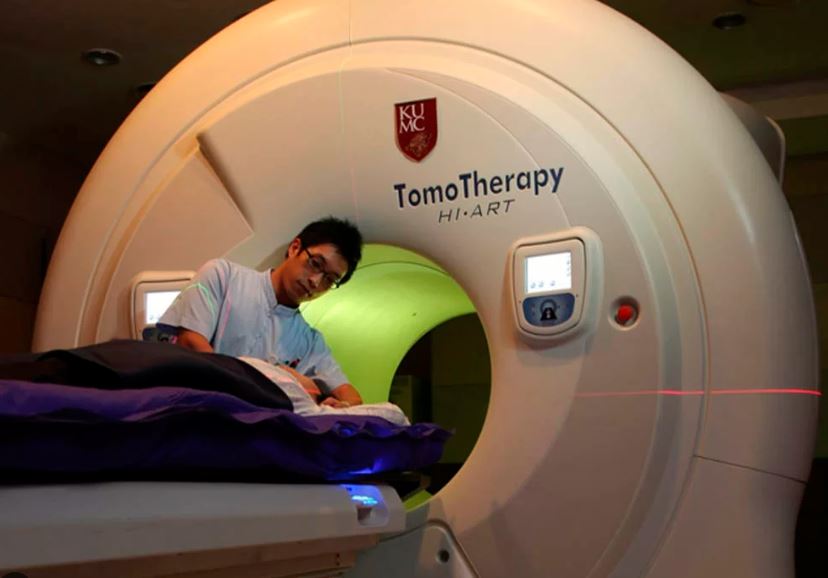
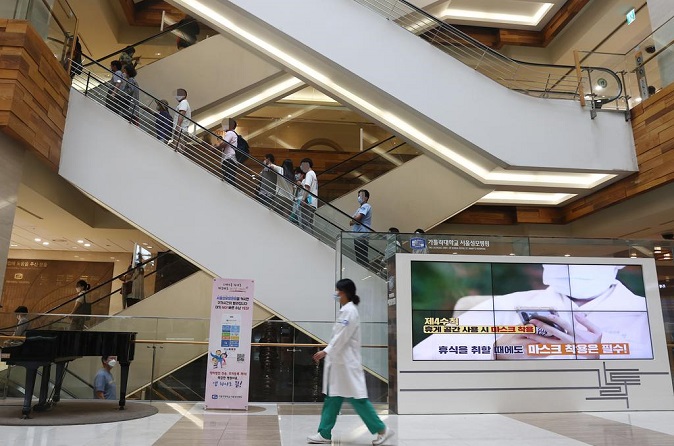
Korea actively provides exceptional care, even for non-Korean speakers. Healthcare professionals actively overcome language barriers to deliver top-notch treatment. Many major university hospitals have foreigner friendly international health care centers where doctors and nurses speak English as well!
Specialized Medical Attention
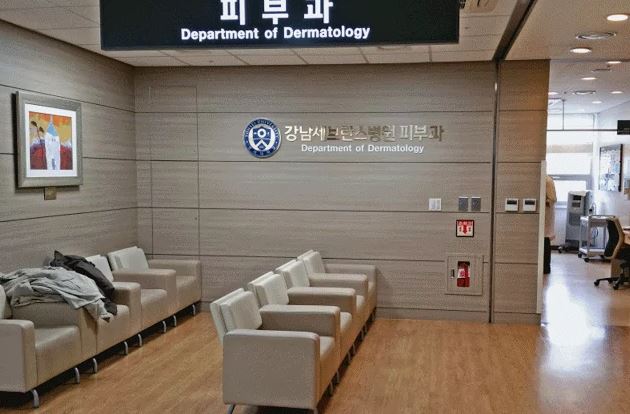
Korea actively maintains an extensive network of specialist doctors. National Health Insurance and the Korean Healthcare system actively covers these services, ensuring personalized medical care in all areas. Whether you need a dermatologist, psychiatry, obstetrics, or other specialty, Korea has you covered.
Comparative Perspectives
Korea’s healthcare, while not free, actively combines quality, accessibility, and efficiency.
In conclusion, if you’re planning to teach English in South Korea, rest assured that the healthcare system will actively cover all your healthcare needs. National Health Insurance, along with skilled professionals and specialized care, ensures you will have the best healthcare available. So, embrace your journey without concerns for your health!
Bella Maselanahails from South Africa where she earned a Bachelor’s of Psychology and has served as an English teacher and Lecturer at the University of SA. Bella currently teaches at April English in Sejong, South Korea.
Teaching English in Korea has been eye opening on so many levels! Stepping into South Korea’s cafe world, time slows, and each coffee promises new connections. My Sejong journey transformed me. Moreover, Korean cafe culture isn’t just about drinks; it’s life woven into existence. Let’s explore five captivating Sejong cafes.
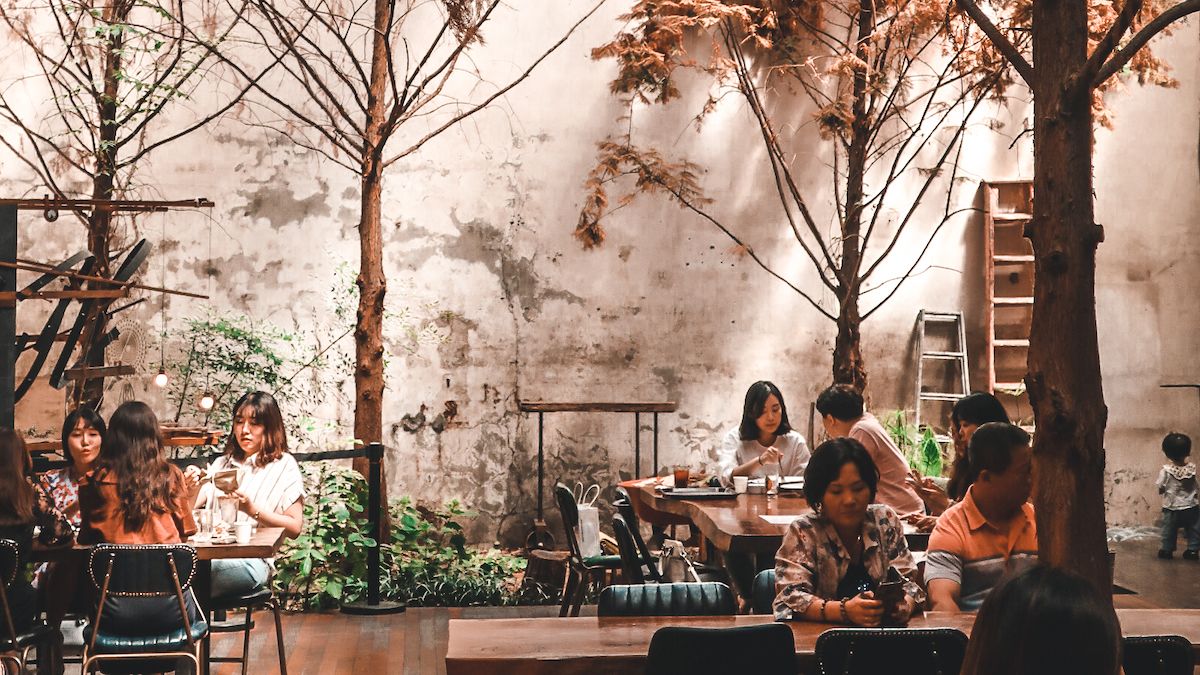
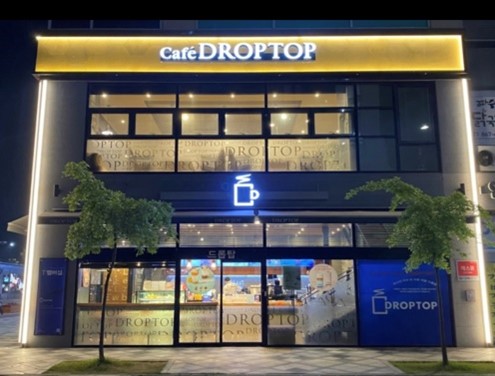
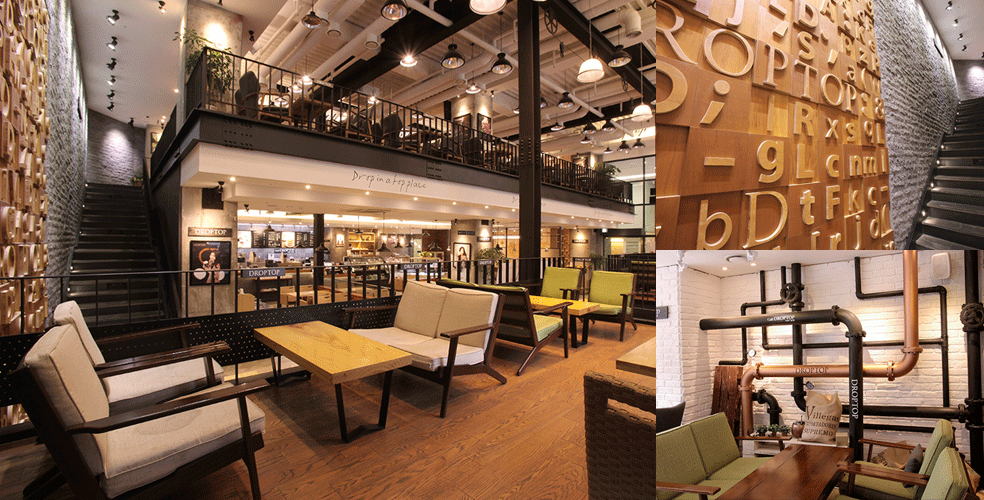
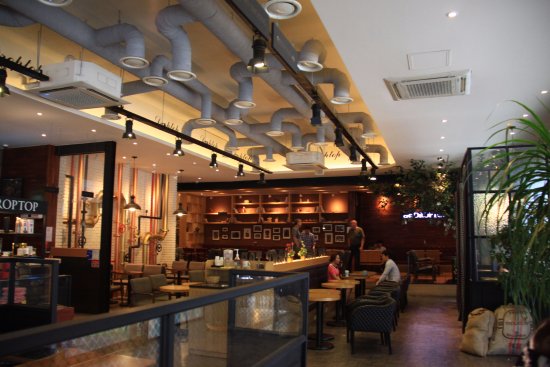
1. Café Drop Top: A Sanctuary for Studious Minds and Friendships
Nestled in Sejong’s heart, Café Drop Top offers productivity and camaraderie. Its cozy setting is ideal for book immersion or engaging conversations. Furthermore, the fresh coffee aroma fosters concentration and connection.
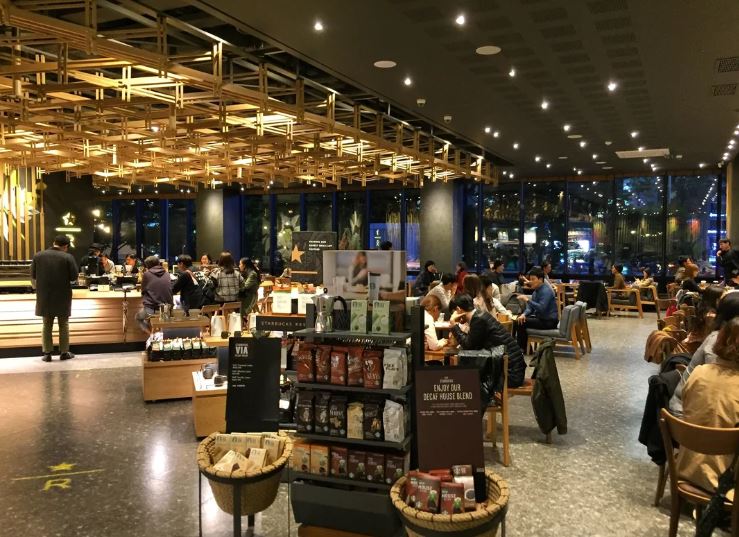
Starbucks: Where Friendships Flourish Over a Cup of Joe
Starbucks, a global coffee icon, nurtures friendships. Friends gather for stories, laughter, and favorite drinks in a welcoming atmosphere with a diverse menu. Additionally, the familiar ambiance makes it a reliable choice for cultivating friendships.
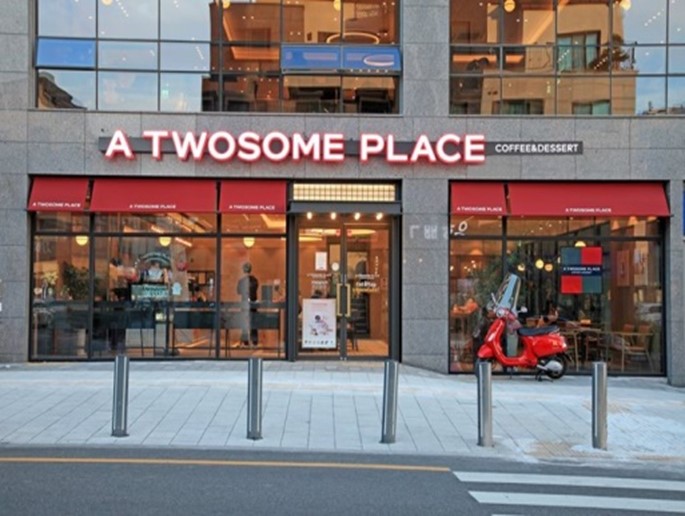
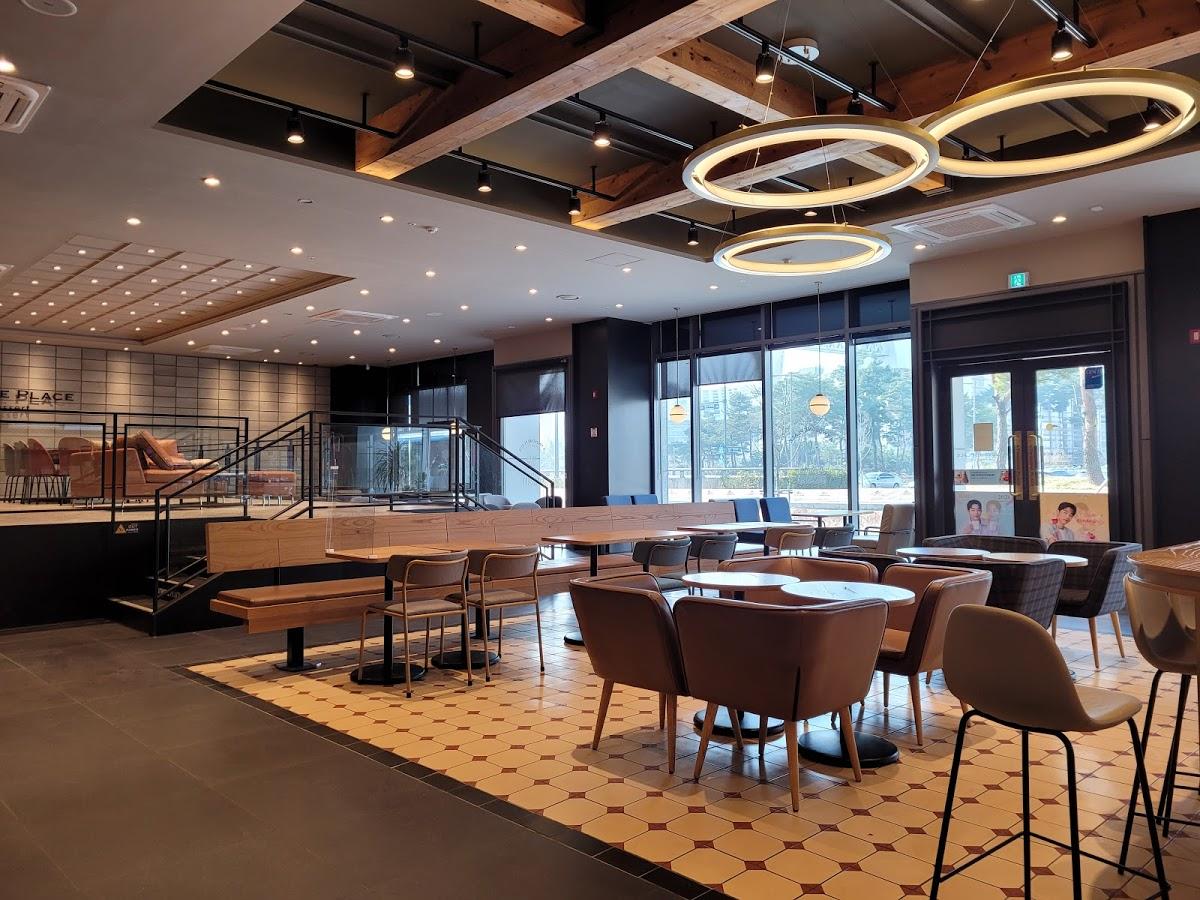
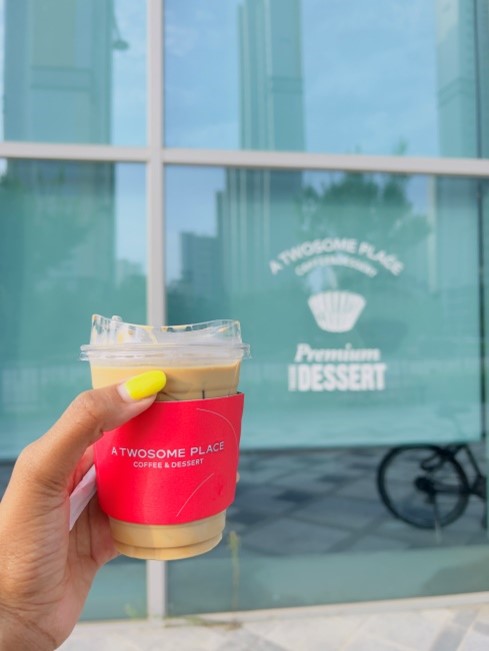
A Twosome Place: Where Intimacy Meets Study Sessions
A Twosome Place blends study tranquility with intimate chats. The soothing design sets the stage for learning and tête-à-têtes. Moreover, coffee enhances connections on every visit.
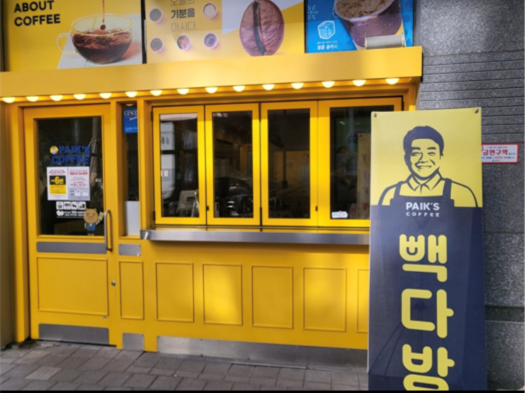
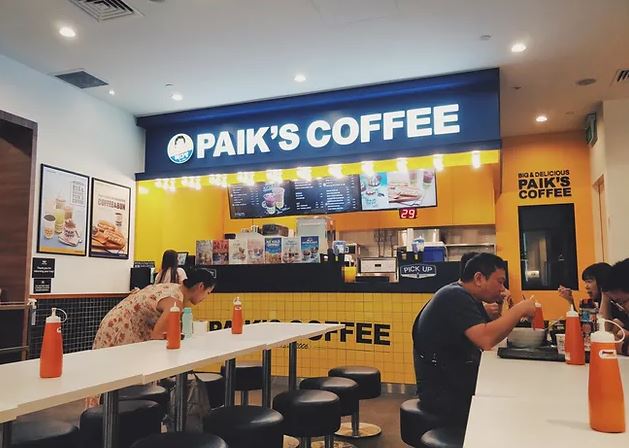
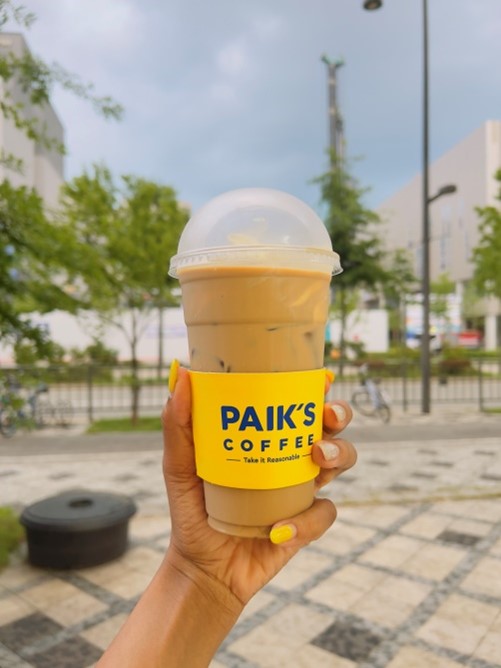
Paik's Coffee: Fueling Ambitions, One Cup at a Time
In Sejong’s fast-paced world, Paik’s Coffee symbolizes convenience. A quick stop refuels with rich coffee, integrating into the city’s hustle. This is a testament to how coffee has seamlessly integrated itself into the city’s hustle and bustle.
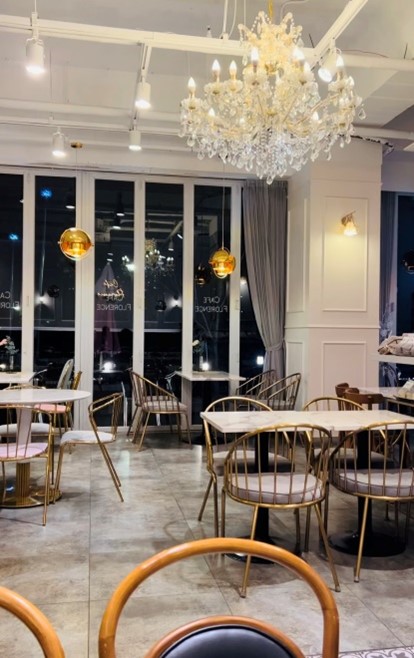
Café Florence: Aesthetic Bliss Amidst Friends
Tucked in Sejong’s corners, Café Florence marries aesthetics with companionship. This charming cafe offers an idyllic setting for friends to relish company while savoring treats. Furthermore, every visit is a visual feast that ignites the senses and fosters connections.
Reflecting on my journey from skeptic to enthusiast, Sejong’s cafe culture reshaped my perspective. Coffee extends beyond flavors; it’s a catalyst for forging bonds, igniting creativity, and creating memories. Moreover, cafes have become the backdrop for heartwarming encounters.
Sejong’s cafe culture weaves camaraderie, productivity, and creativity. For me, it painted warmth, intimacy, and vibrant connections. Each cafe provides a canvas for friendships to flourish, ambitions to be fueled, and experiences to be cherished. As a result, memories linger like the aroma of coffee, a testament to Sejong’s profound cafe culture impact.
Bella Maselanahails from South Africa where she earned a Bachelor’s of Psychology and has served as an English teacher and Lecturer at the University of SA. Bella currently teaches at April English in Sejong, South Korea.
Teaching English in Korea is an exciting adventure. However, the idea that you will not know exactly where you will be living can be a big source of trepidation. South Korea offers a diverse array of housing styles, but officetels and villas are two of the most popular housing types for English teachers in Korea. While your local branch often handles accommodation arrangements, let’s explore these two popular types of housing for English teachers in Korea.
Officetels: The Modern Living Solution
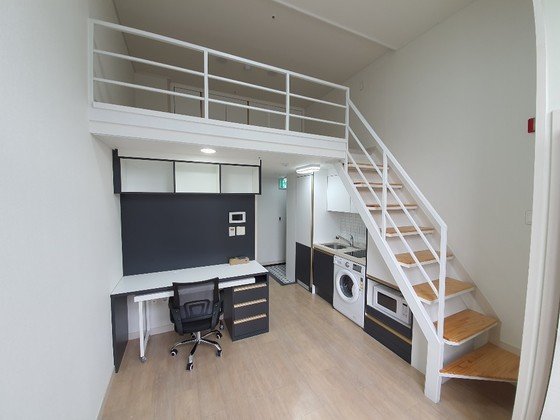
Officetels, blending “office” and “hotel,” are often compact living spaces in large apartment-style buildings that combine residential and commercial functions. These multifunctional units offer a unique living experience. They are particularly well-suited for urban areas. Officetels offer so much convenience in their close proximity to public transportation, shops, and amenities. In bigger cities, officetels may even come fully furnished (though you should be informed that some teachers might have to furnish apartments themselves).
In South Korea, some officetels feature a unique split-level design with added space above the main area, accessible via stairs. This design separates functions like a loft, workspace, or storage area. Modern and efficient, officetels maximize comfort in limited space. Officetels are also typically very modern and efficient, and allow you to maximize the use of limited space without compromising comfort.
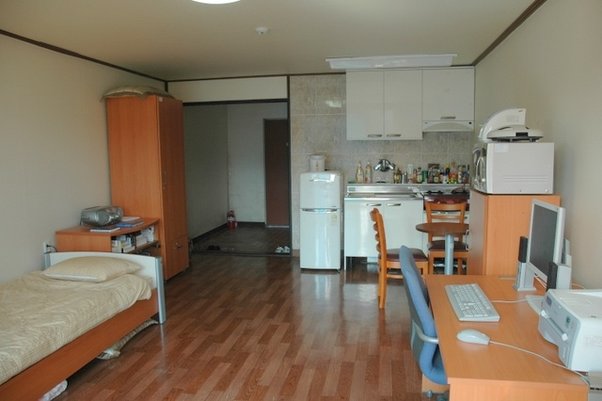
Villas: Traditional Comfort
Villas in Korea vary widely in size and style. You might find yourself in a studio apartment, or a larger family-oriented unit. Villas generally come in various layouts and offer more space compared to officetels. This makes them ideal for couples or those who value larger living areas.
Typically located in residential zones, villas usually provide a quieter, more private living environment. Think of it more as a neighborhood vibe instead of a large apartment complex. Villas are usually in 2-3 floor buildings. You also won’t lose creature comforts as convenient stores, local drycleaners and other services are always within a few blocks.
Pros and Cons
Depending on your contract type, you may have a choice in where you live. In other contract situations, you will be provided a place to stay by your local branch. Regardless what option you choose, you can be confident that your housing will have pros and cons, just like anything else in life! Regardless, both villas and officetels fulfill modern living needs.
Tour Of My Place
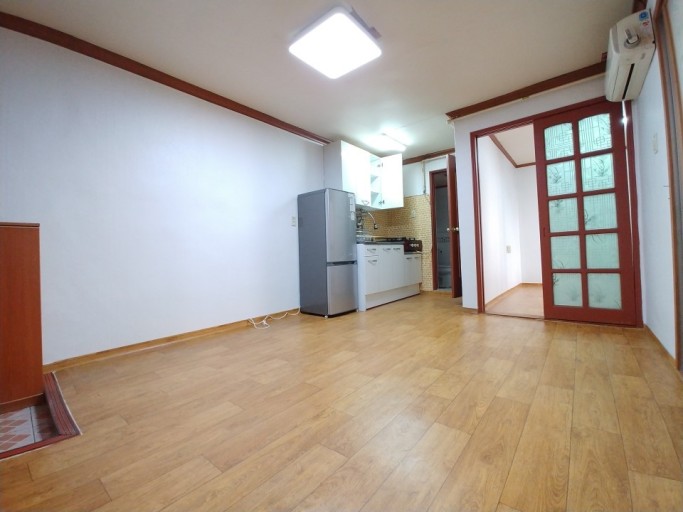
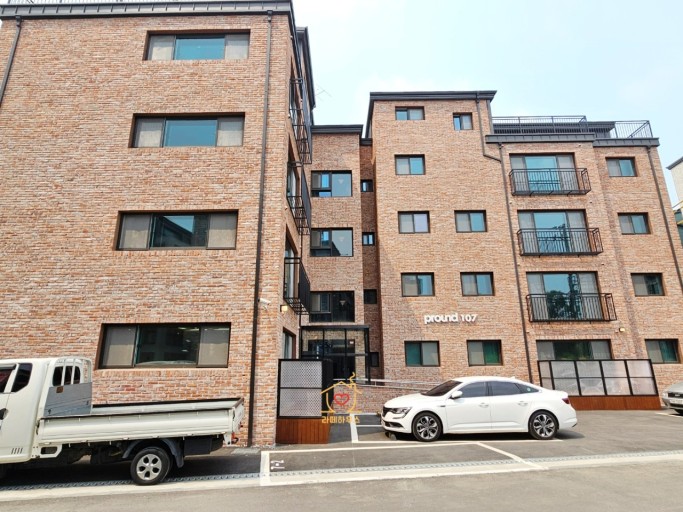
Here are some pictures of my officetel. I was placed at the Sejong location, where the entire town was built in just the past several years, so it is very unique in that it was built just a year before move-in. That being said, most officetels are built in the last 20 years, so compared to other developed countries, all buldings are very new.
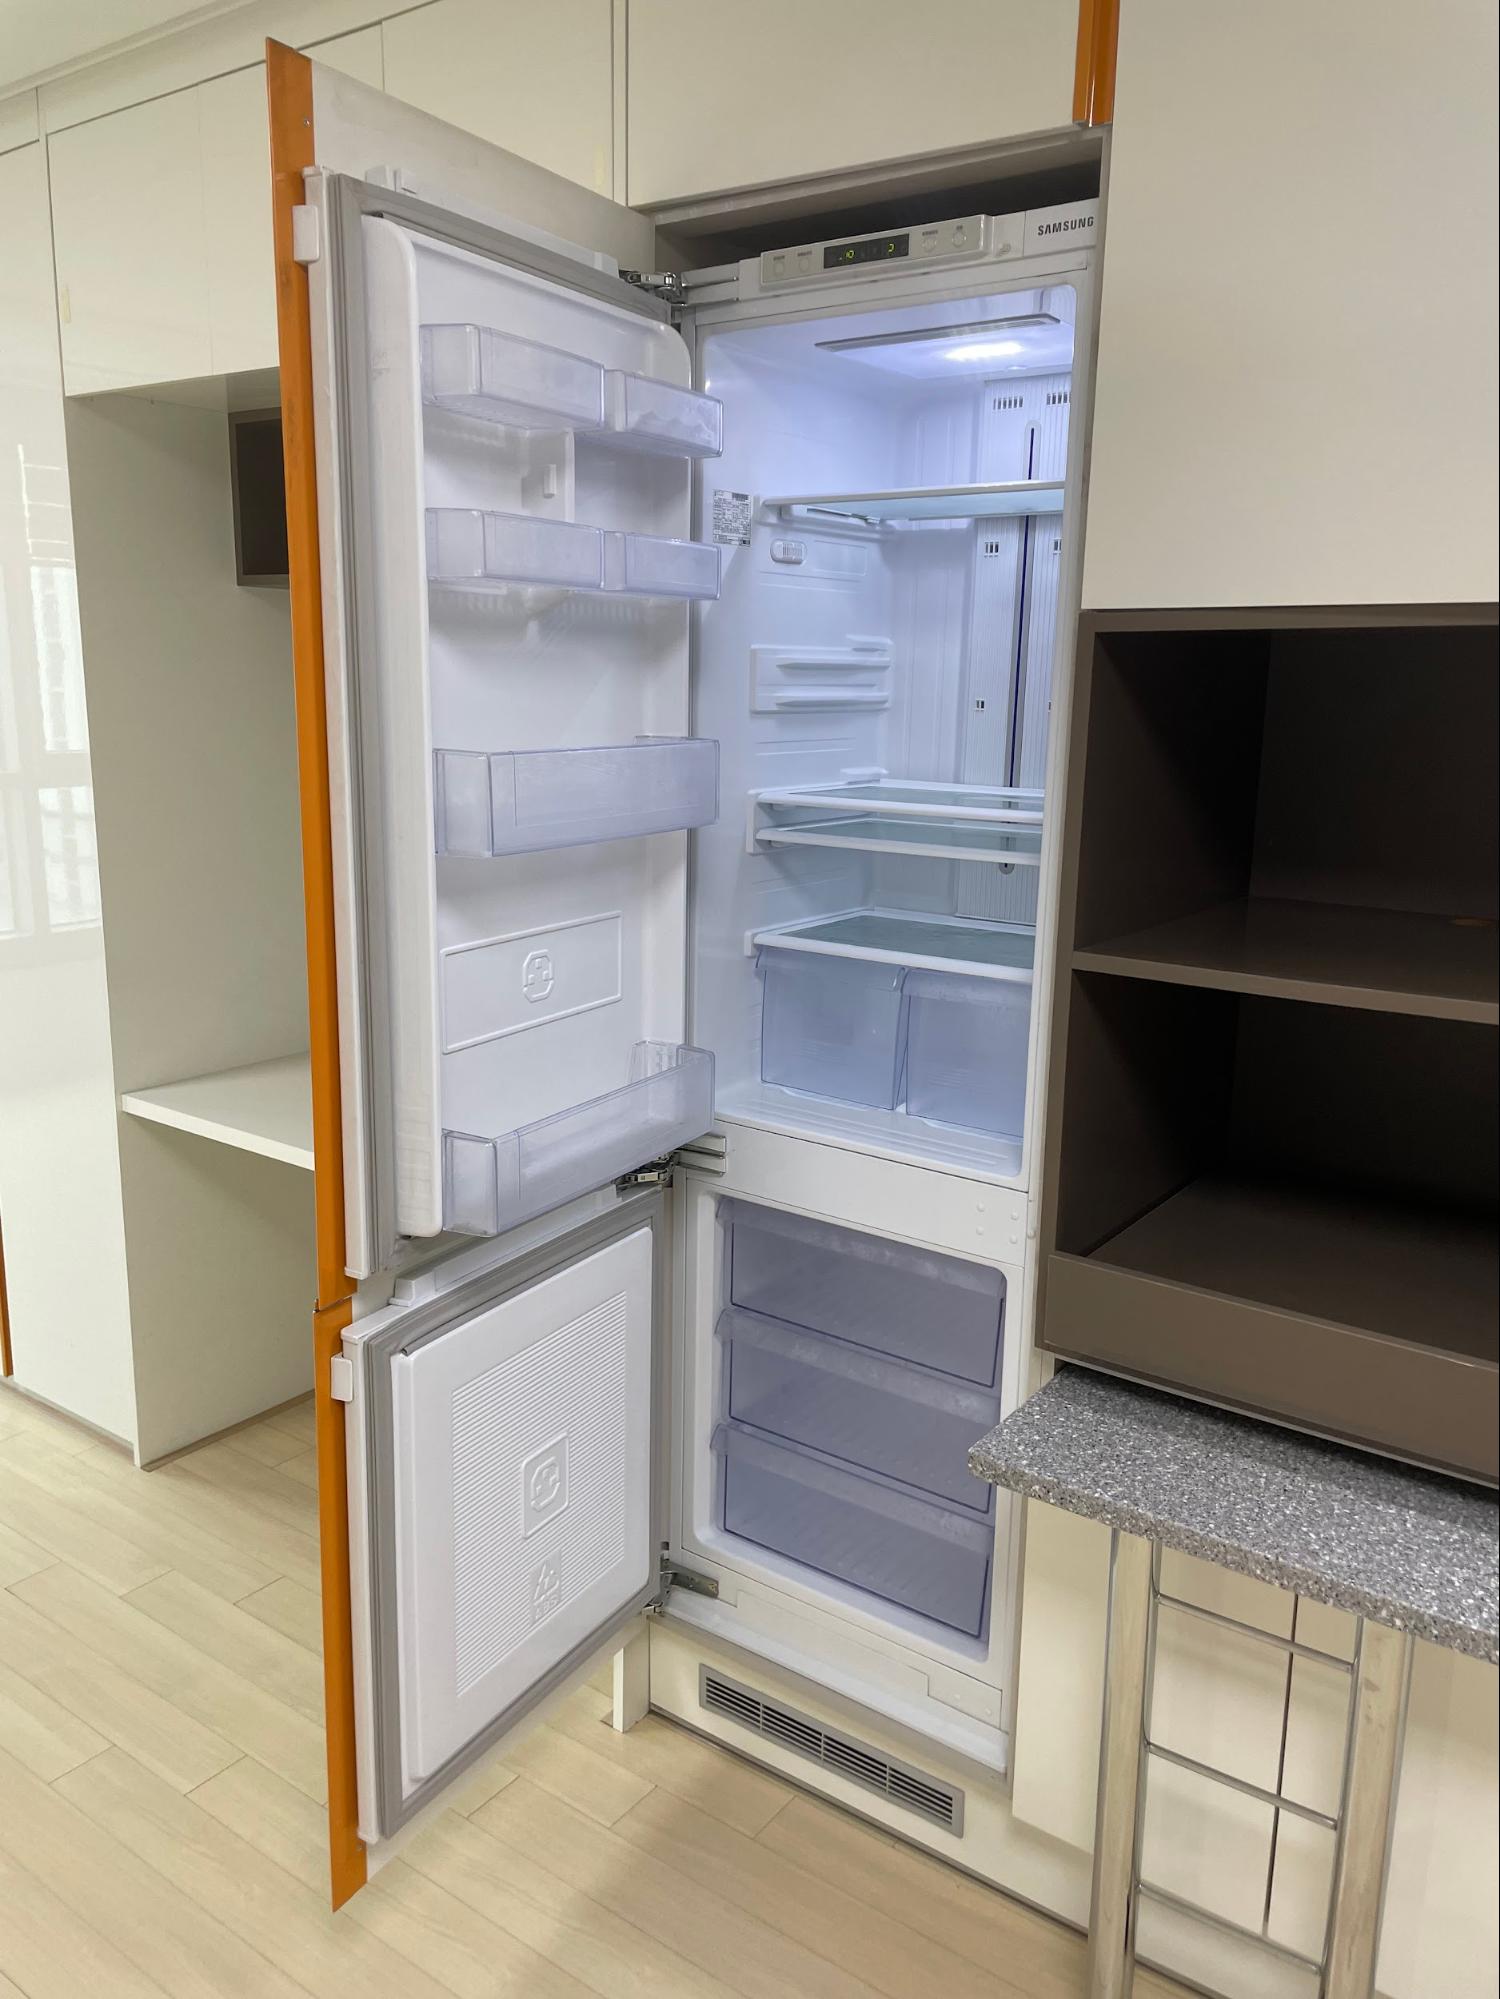
The door lock operates using a pin pad system, which is fantastic because you won’t have to worry about losing your keys. The unit covers 92 square meters and provides generous storage space. You’ll also find built-in appliances like a refrigerator and washing machine for added convenience.
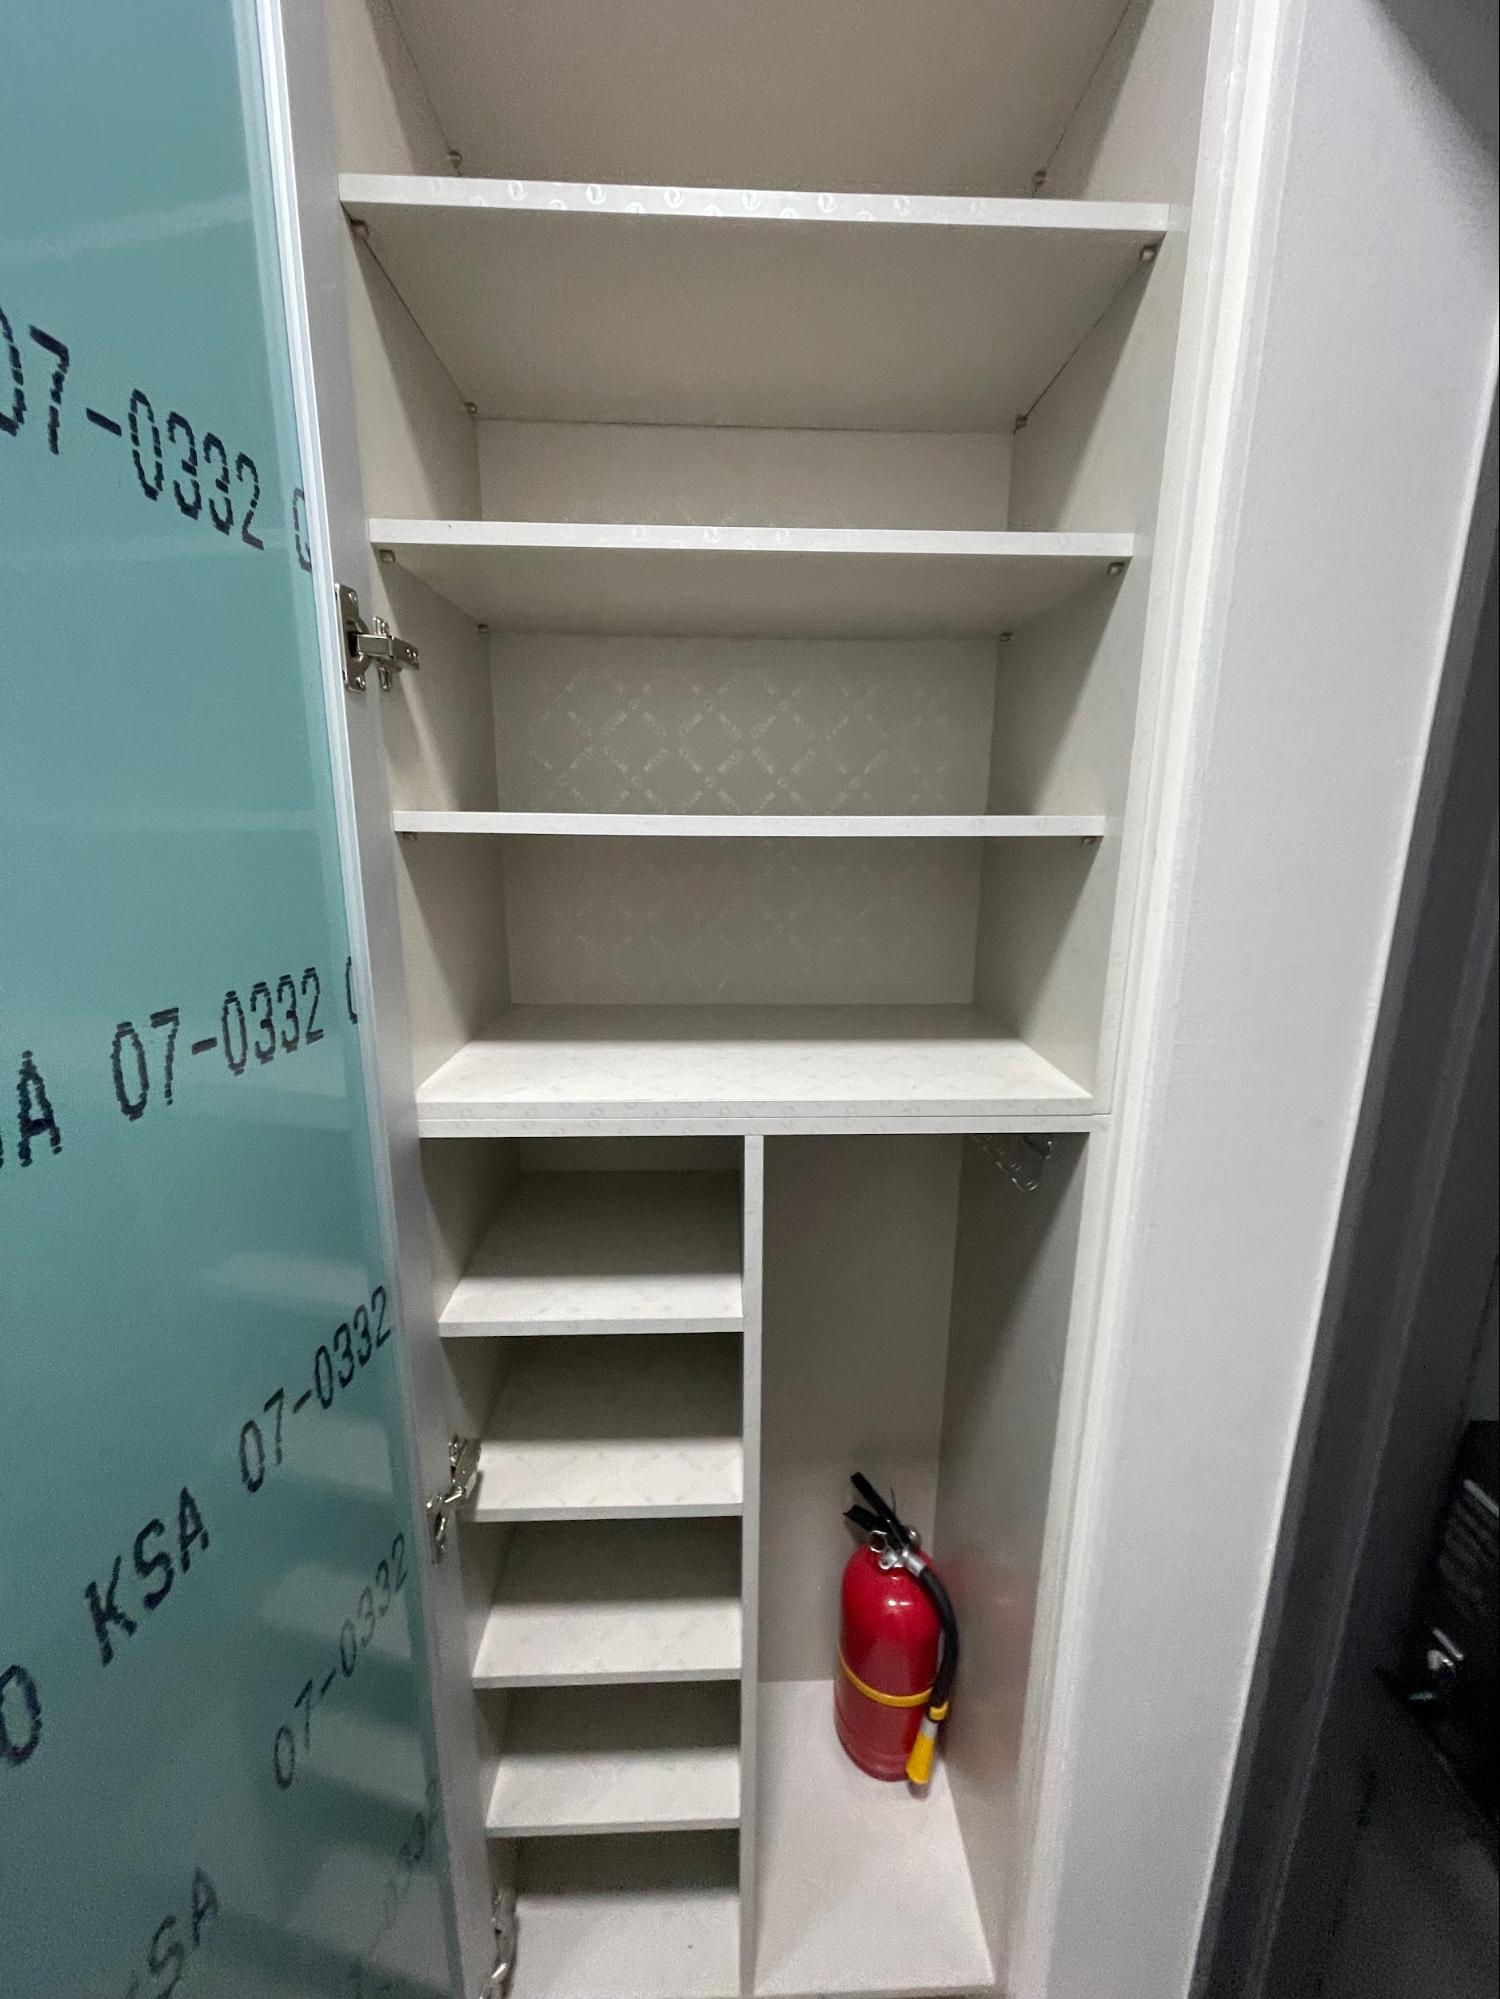
As you step inside the apartment, there’s a spot to remove your shoes and store your indoor slippers – a common practice in South Korea. The apartment is also supplied with a fire extinguisher and plenty of shoe shelves.
The closet space feels a bit compact, but you can optimize it by incorporating inserts and utilizing specific hangers to conserve space and maintain order. Additionally, an interesting discovery: the bottom door on the far left is, in fact, a pullout drying rack for clothes!
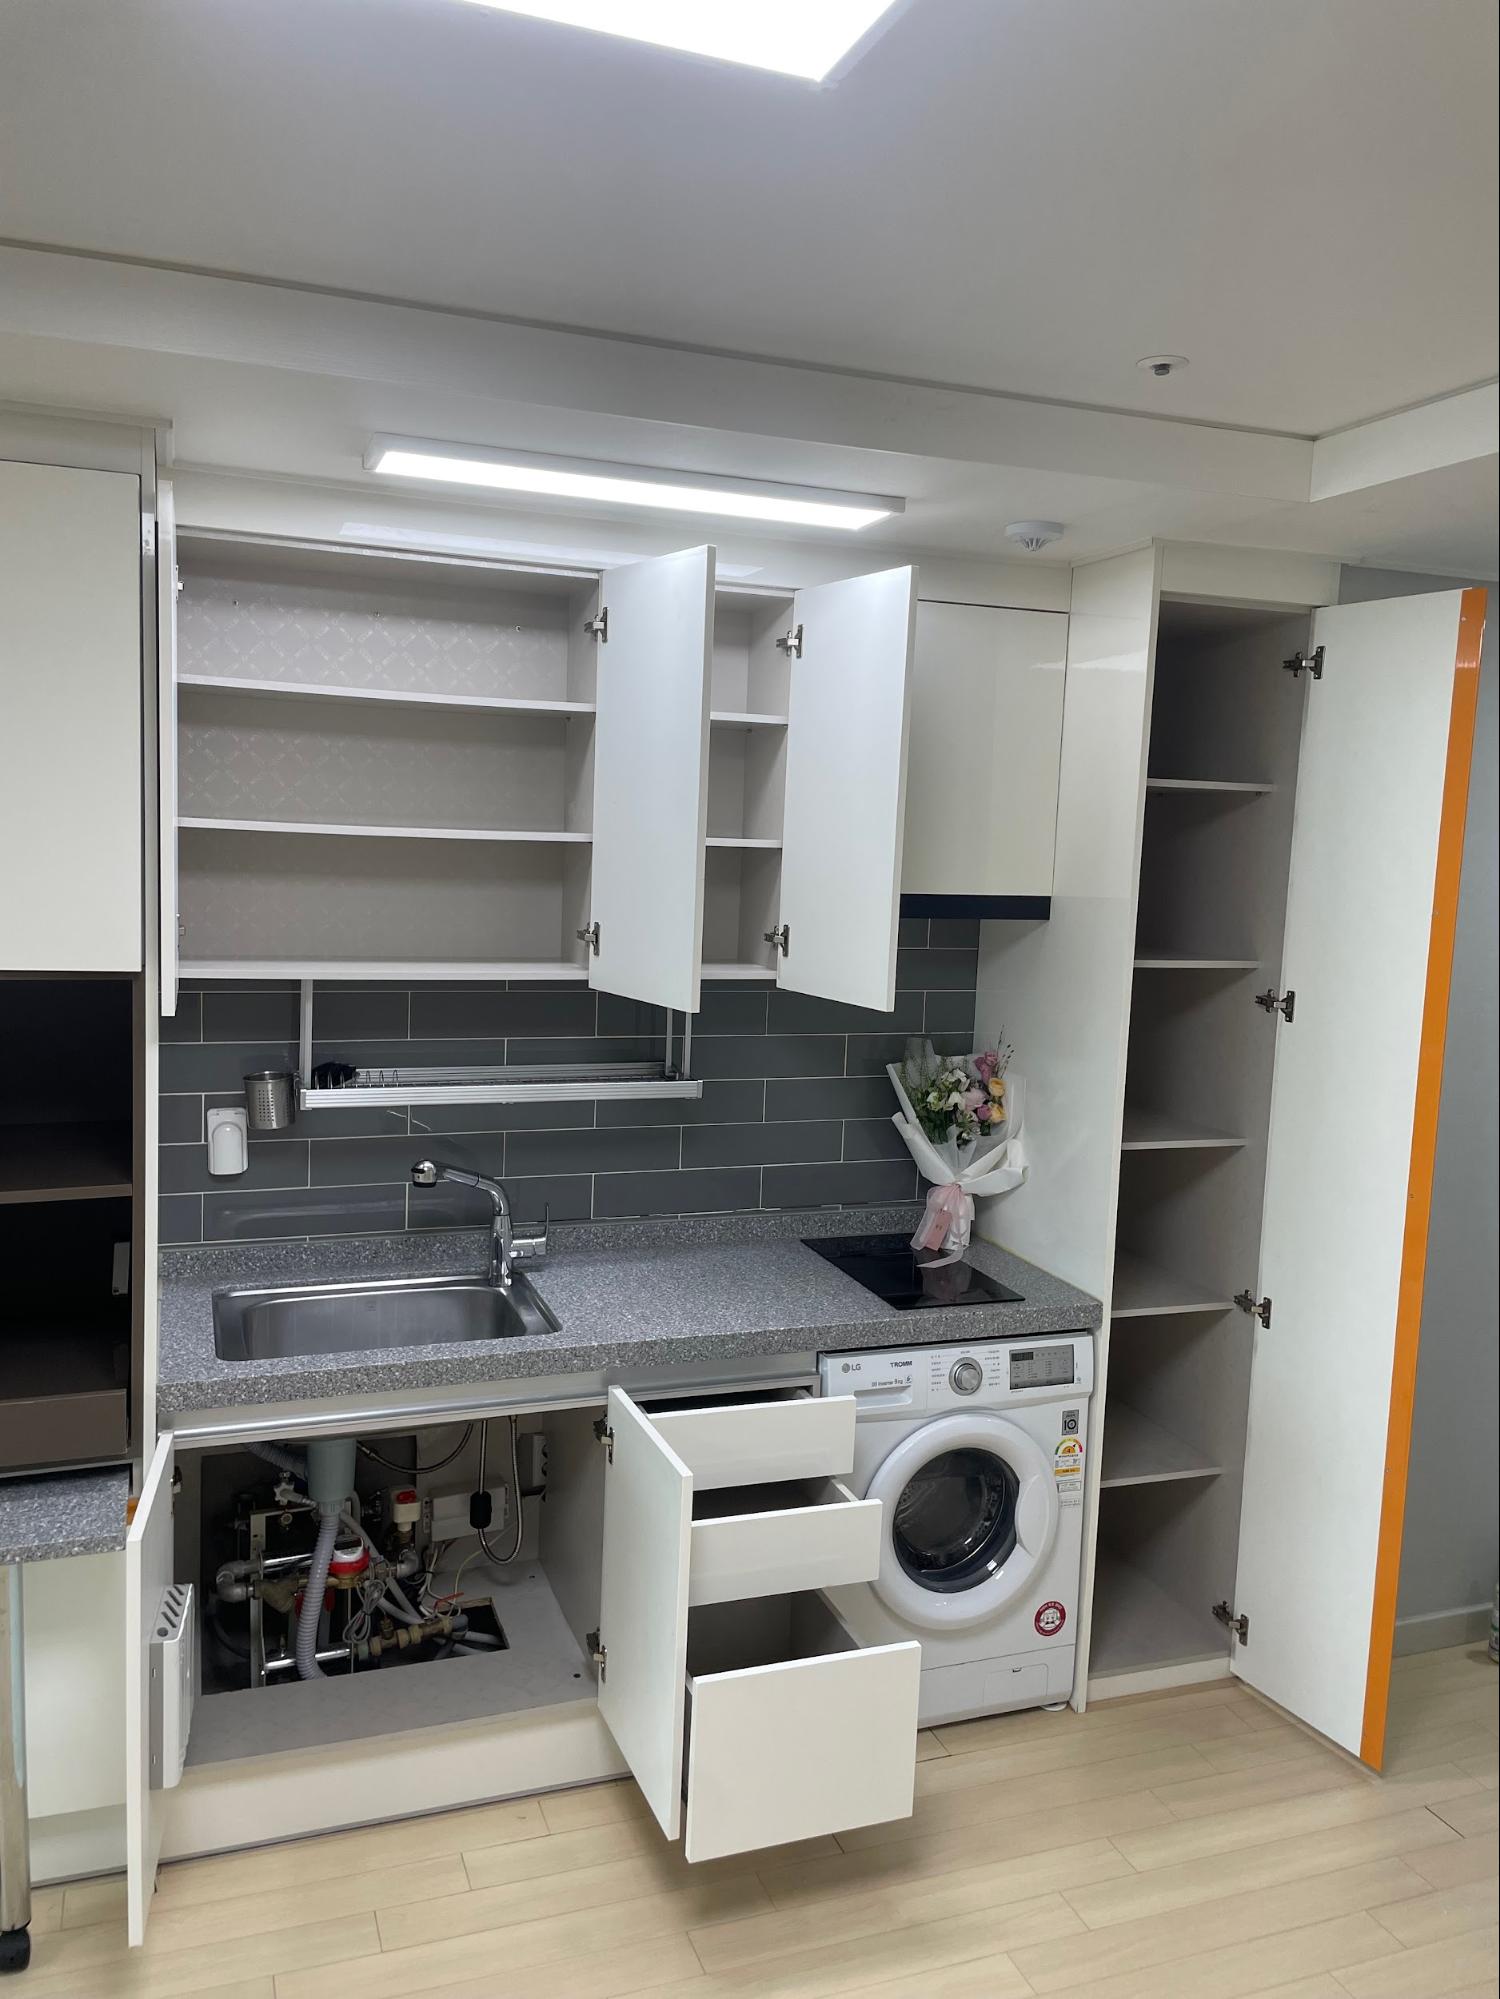
The wall incorporates a cleverly designed kitchen with a two-burner electric stovetop, a built-in refrigerator and freezer, and cabinets hosting a dish drying rack underneath. Beneath the sink, a knife holder is in place, while above the sink serves for dishes. The space to the right is perfect for arranging food and spices.
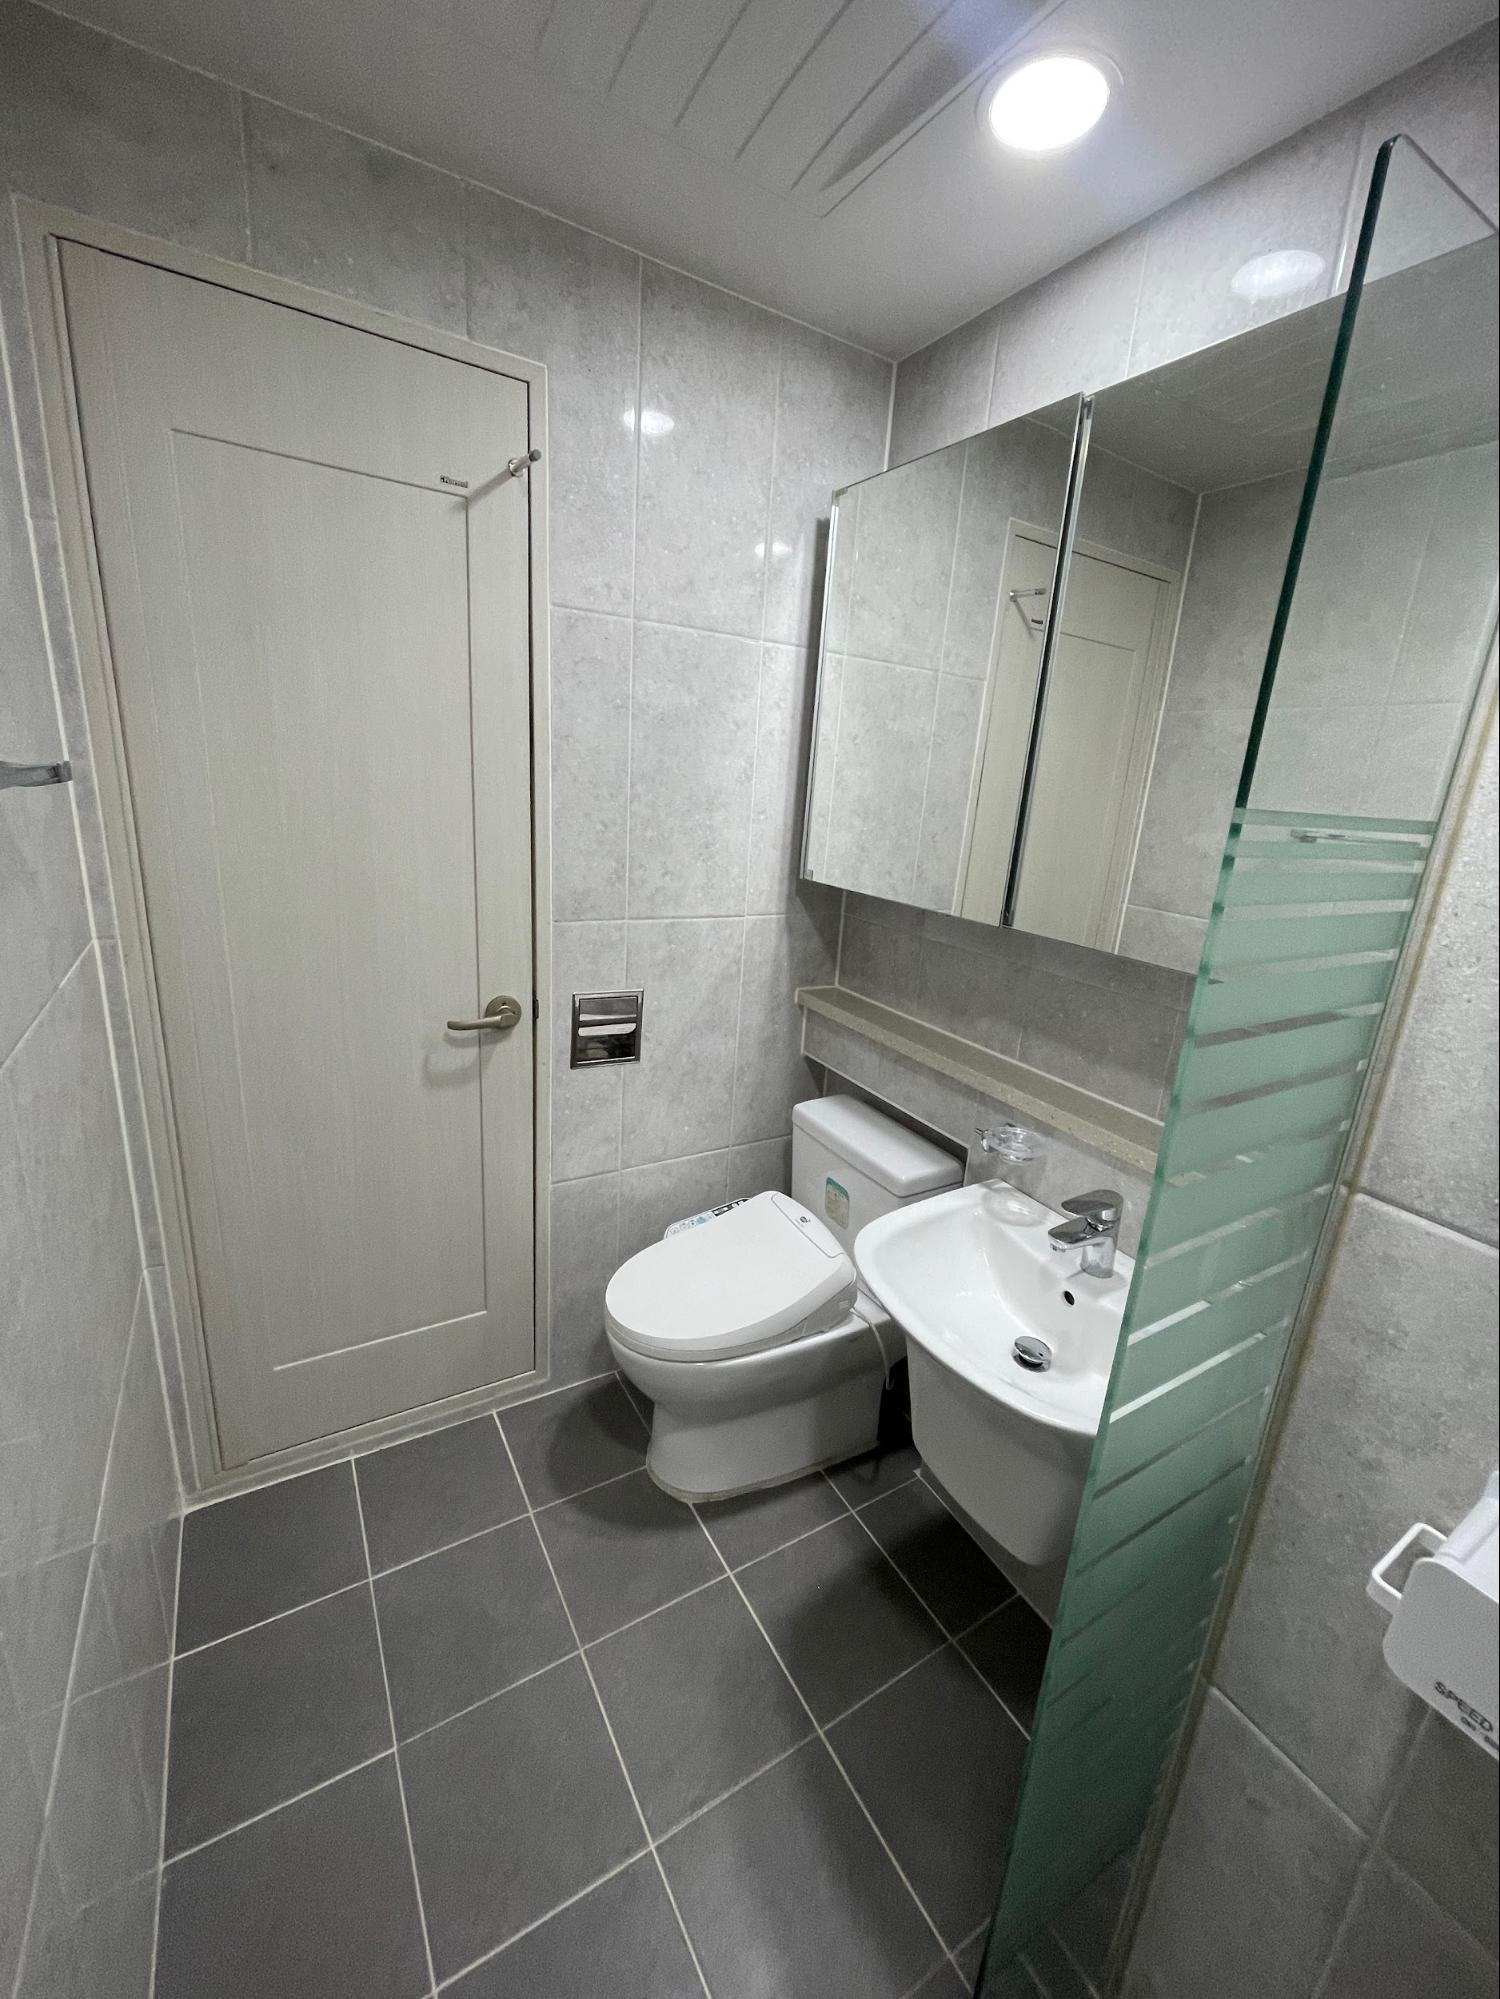
Bathrooms in South Korean officetels and apartments are modern and distinct. They frequently showcase open shower areas, advanced bidet functions, and efficient layouts within limited spaces. Some bathrooms even boast natural light, floor heating, and soundproofing. I really appreciated the presence of a bidet in my bathroom.
Bidets are a standard fixture in South Korean bathrooms, whether in officetels or villas. Electronic bidet toilet seats, offering adjustable water temperature, pressure, and air drying functions, are common. Properly ventilating bathrooms is crucial, as expats sometimes note mold issues; however, this problem is typically easy to prevent!
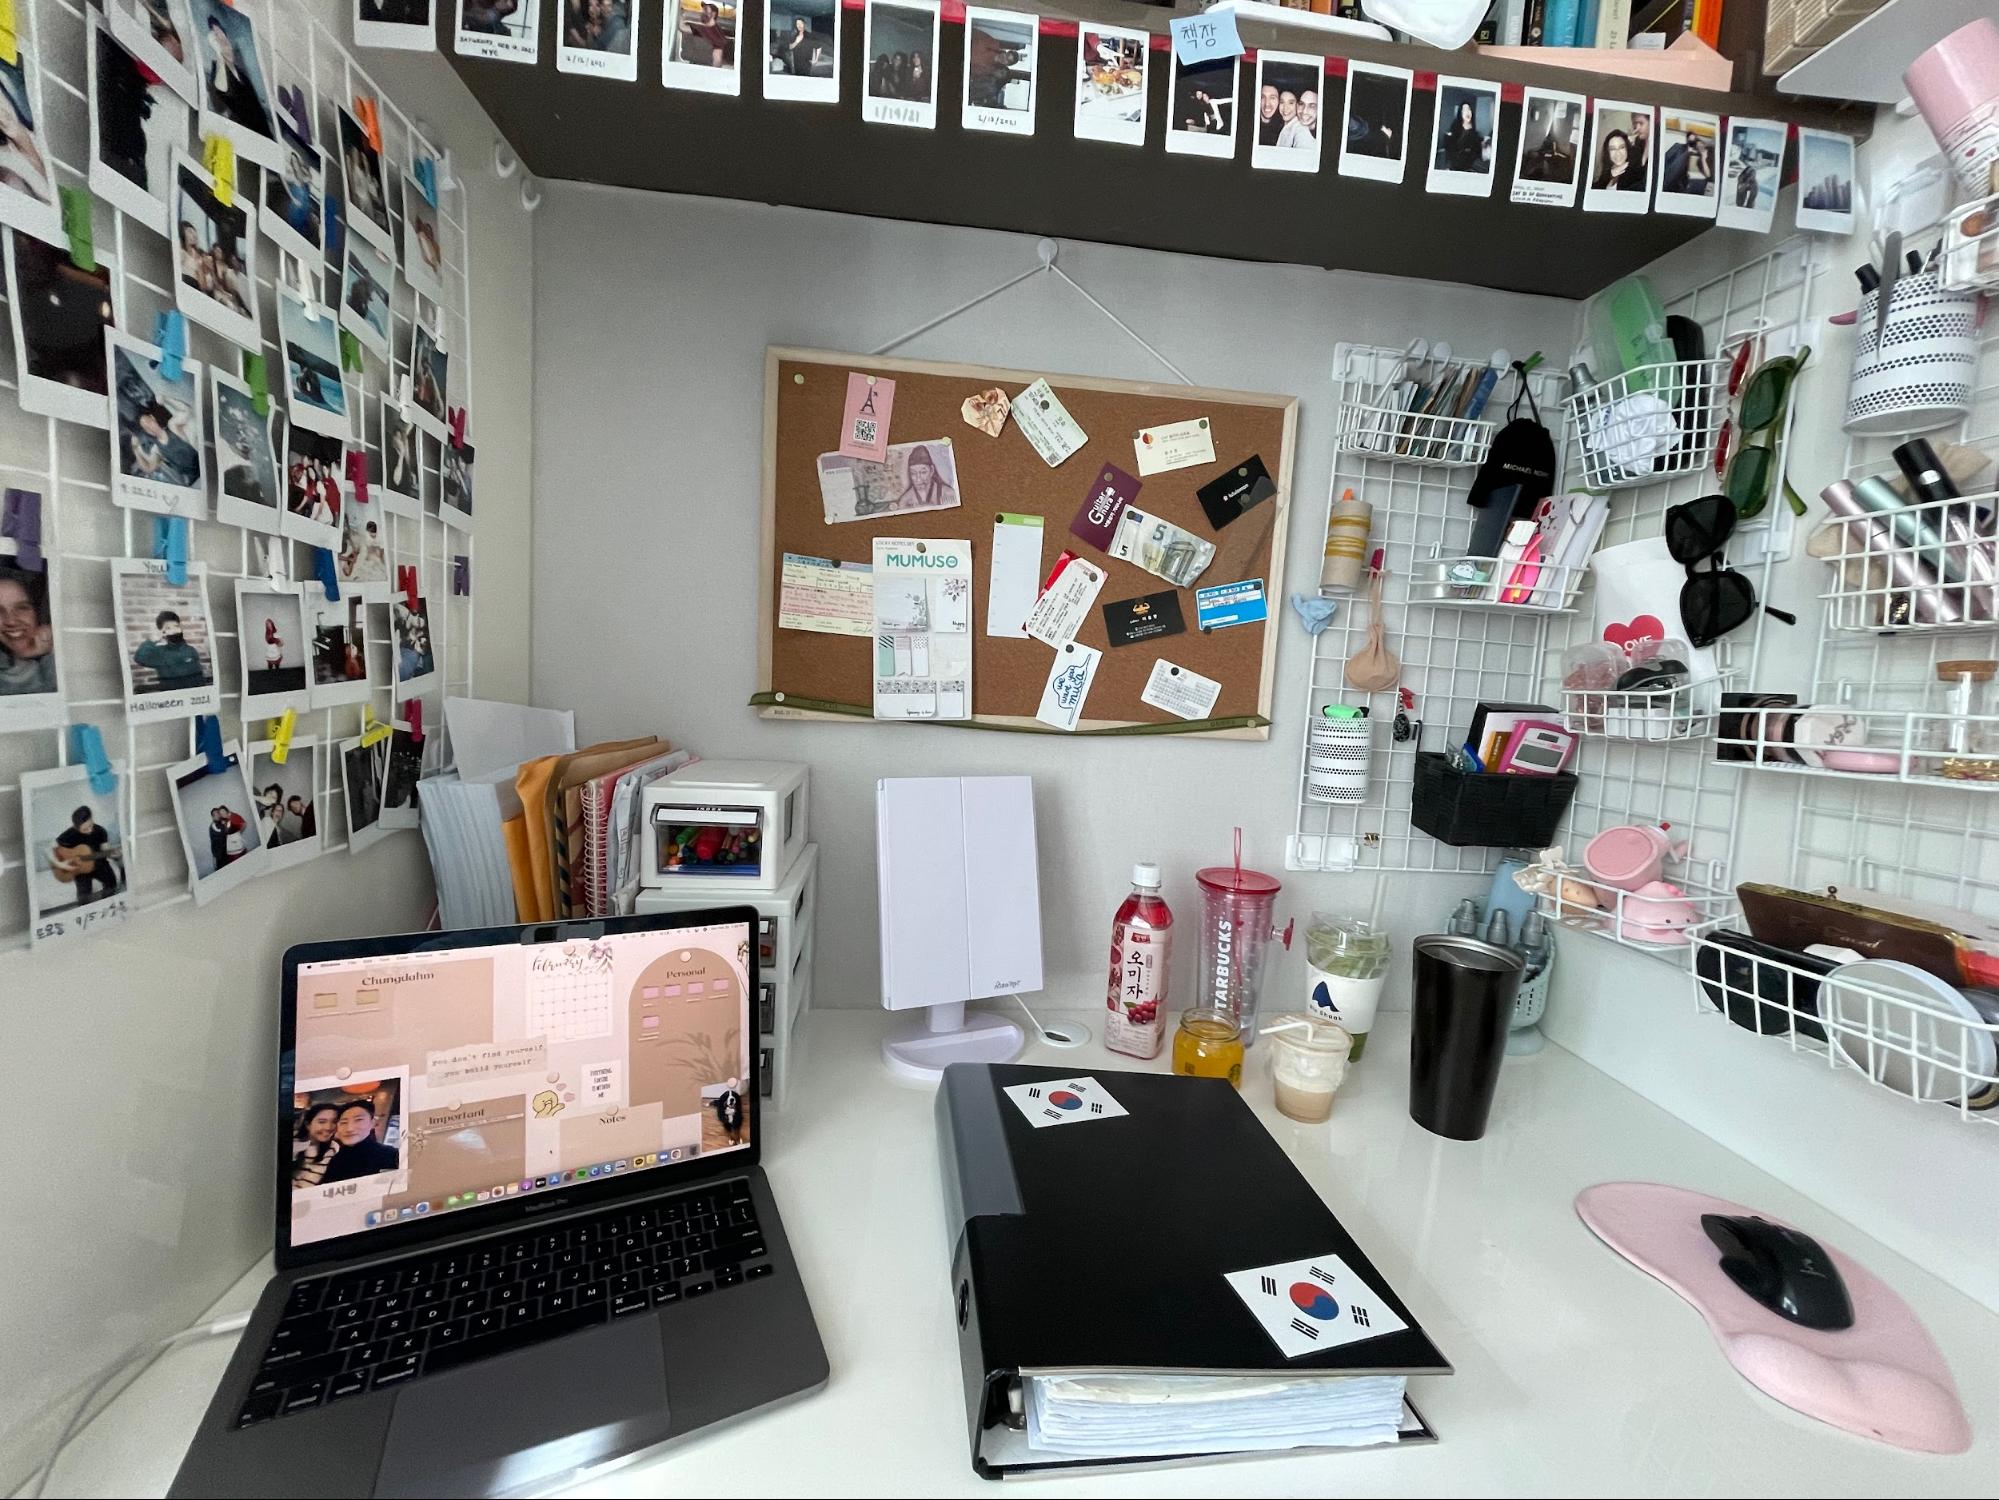
Originally, I used this area as desk space, though later decided to turn it into the TV area. Here is a picture of the space used as a study and work zone. Daiso has lots of creative organizers which can allow you to store more of your things without taking up too much of the working area!
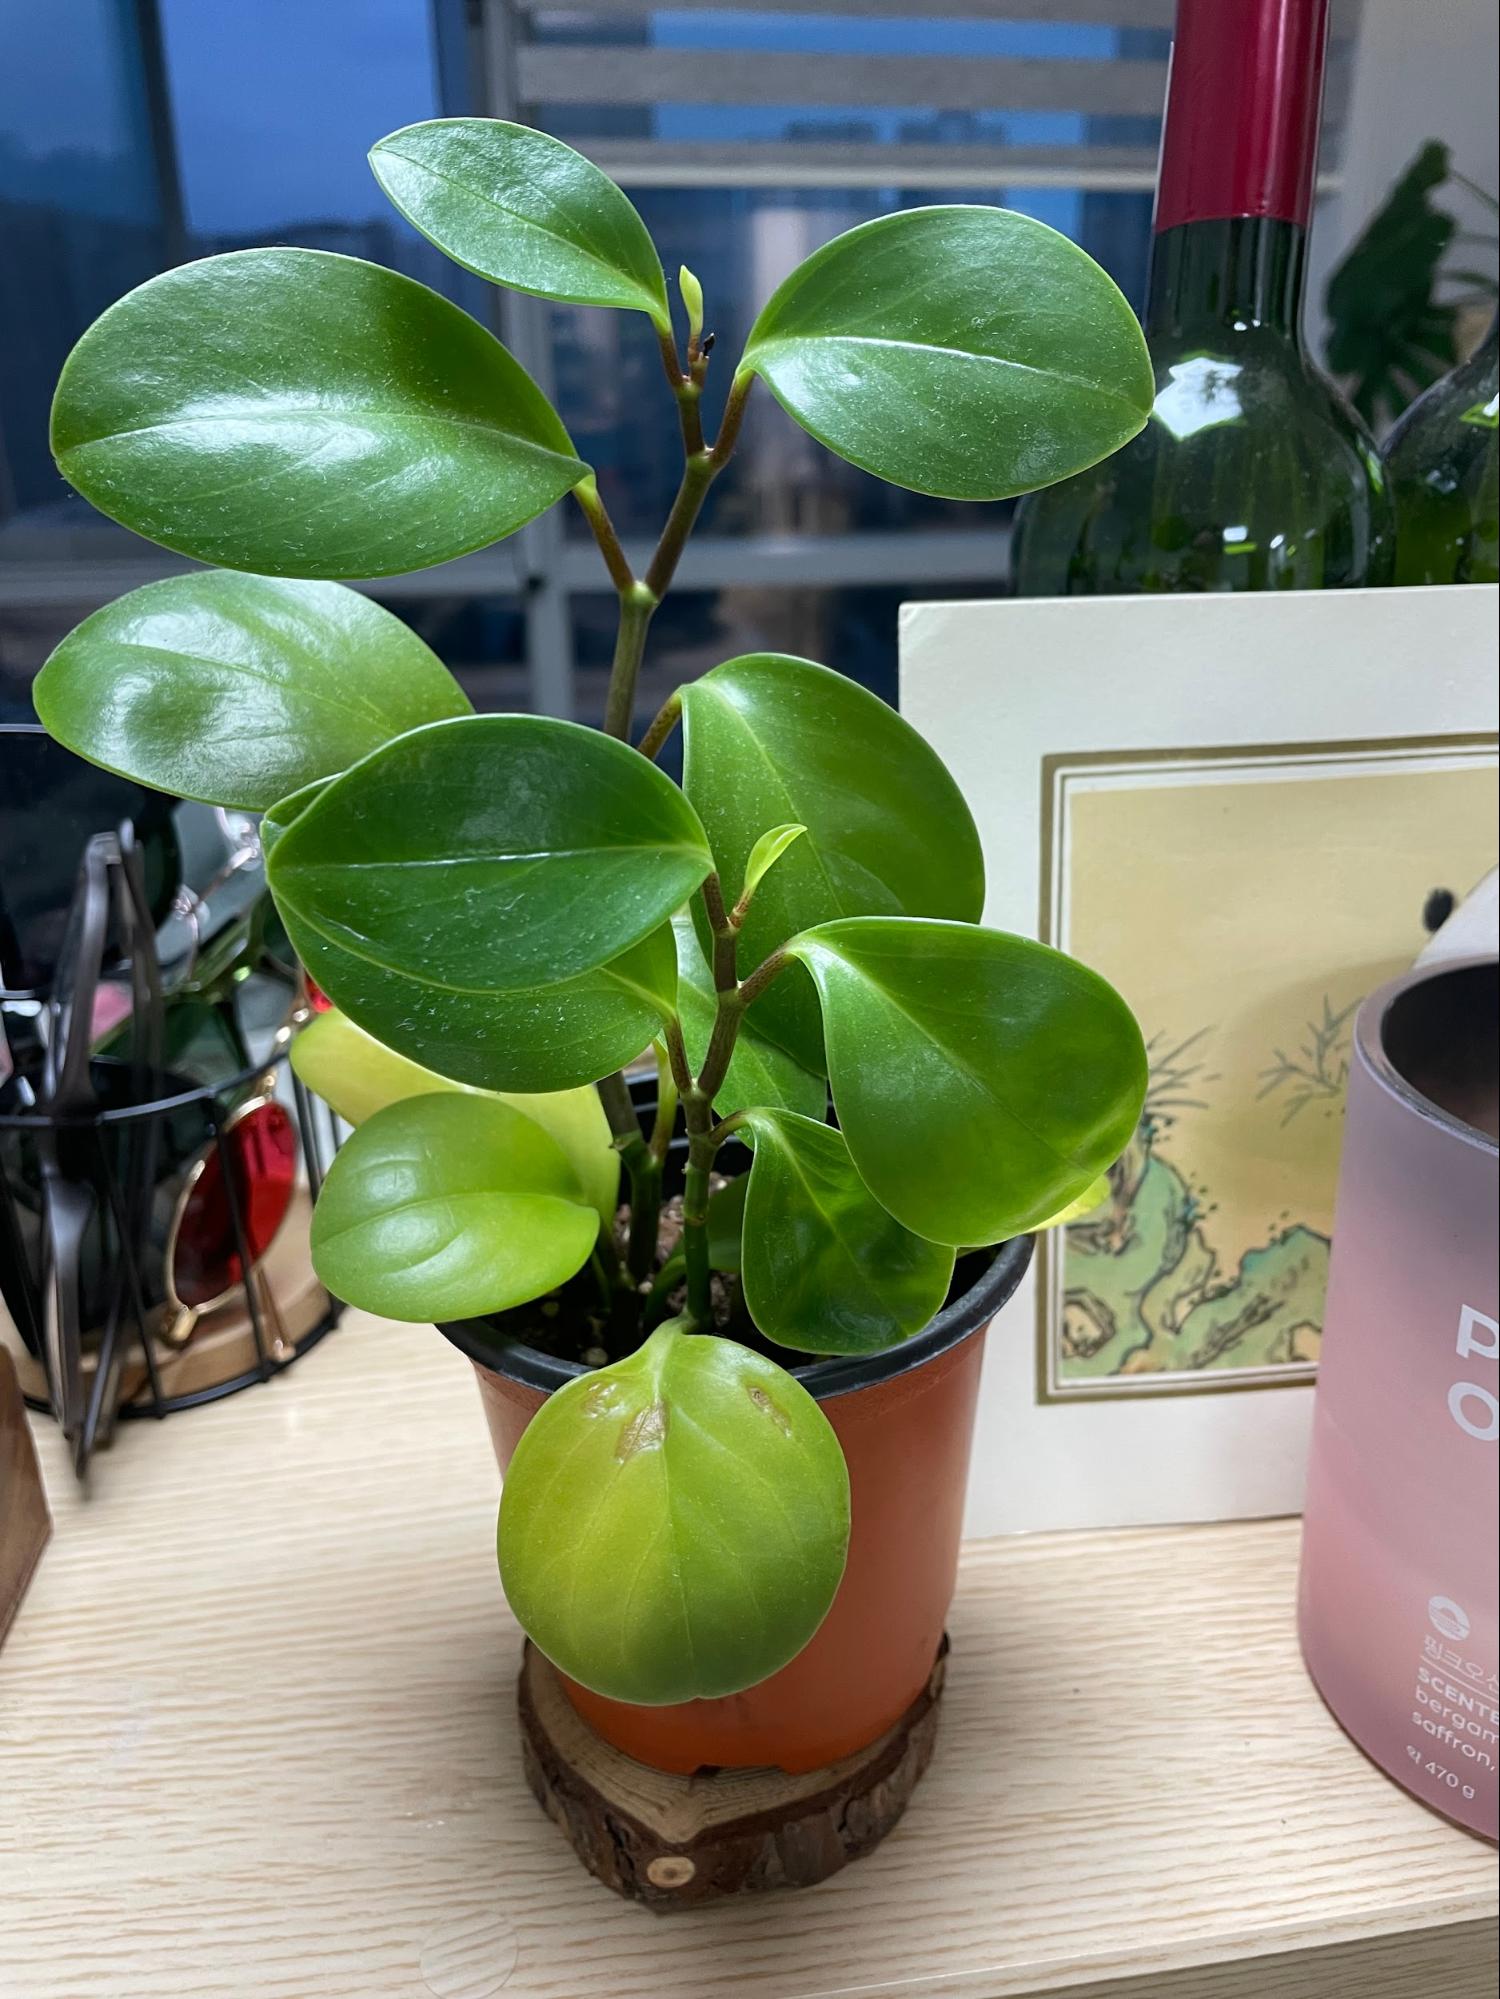
I highly recommend getting some plants. They’re an excellent way to liven up any space and create a homely ambiance. Hanging plants, monsteras, and cacti are fantastic choices that require minimal upkeep!
As you dive into your Korean journey, remember that your apartment is more than just a place to stay – it’s your personal haven. Whether you’re in an officetel or a villa, these unique Korean living spaces offer countless ways to find comfort. From optimizing your kitchen, to adding a touch of nature with easy-care plants, to decorating with photos and friends from home, you can truly make your space your own.
내 집만한 곳은 어디에도 없다!
“There is no place like home!”
Alexandra Skourasis from Pennsylvania, USA, and has been living in South Korea since April 2021. She studied Biology and Spanish during college but decided to embrace her love of travel and cultural diversity through teaching English in other countries. After spending one year teaching in Madrid, Spain, she decided to move to South Korea, and since then has been teaching Chungdahm April in Sejong. Her favorite part about teaching is connecting with students and seeing how much growth they can achieve in just a short period of time. Alexandra describes her Korean life as the perfect mix of comfortable and exciting, and is passionate about encouraging other people to take the leap of faith and try something new.
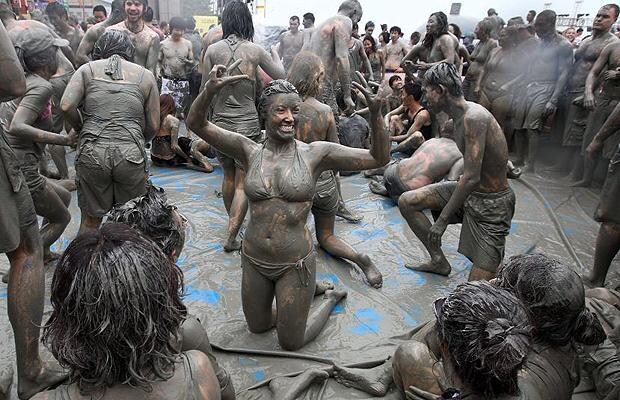
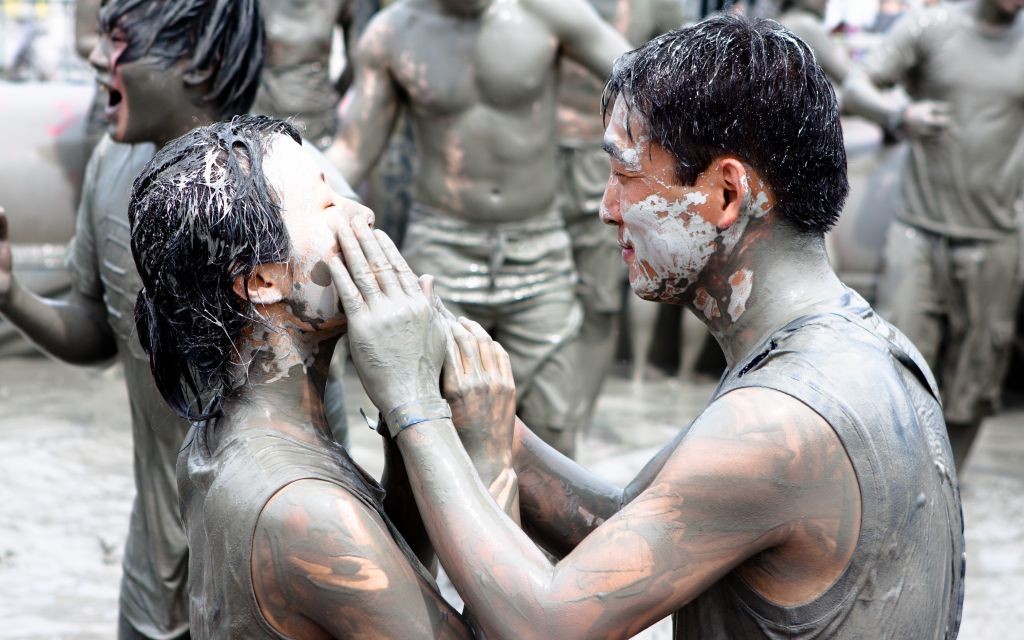
Looking for a getaway involving water gun fights, obstacle courses, DJ sets, and mud baths in Korea? The annual Boryeong Mud Festival is the way to go! I’ve recently attended the festival in July. To say that it was amazing is an understatement. This event released my inner child, brought laughter, smiles, and great memories.
Worthy Boryeong Mud Knowledge
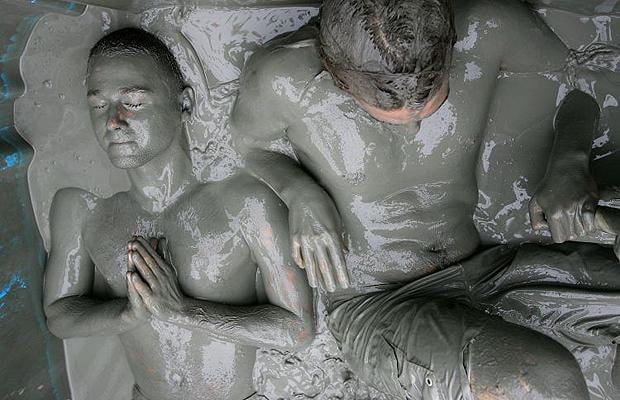
The Boryeong Mud Festival isn’t all about fun. Mud powder is processed from the mud taken from Daecheon Beach in Boryeong. Mud water is extracted, and then the left-over mud powder is what is used in these skin products. Germanium and bentonite slow skin aging, exfoliate, and rejuvenate. More specifically, germanium improves skin contraction and skin elasticity! In addition, bentonite helps calm irritation/redness, and promotes healthy, glowing skin.
Transportation & Admission
The best way to travel to this beautiful coastal city is by bus. It is about a 2.5 hour ride outside Seoul. You can purchase bus tickets at Seoul Station (prices range from 11,000-18,000 KRW), and you can buy festival tickets on the Boryeong Mud Festival website for only 14,000 KRW.
Special Features
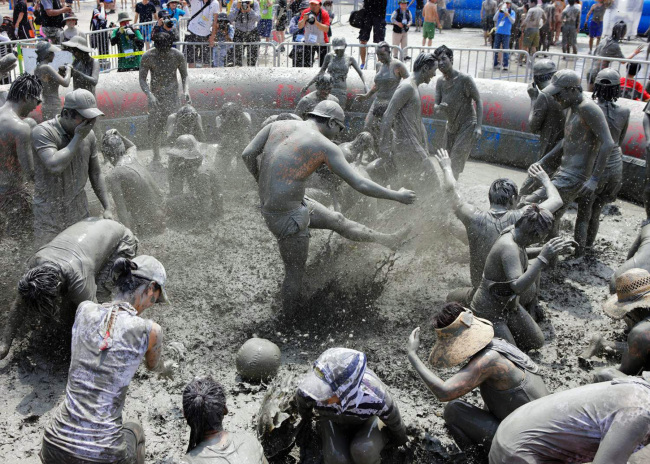
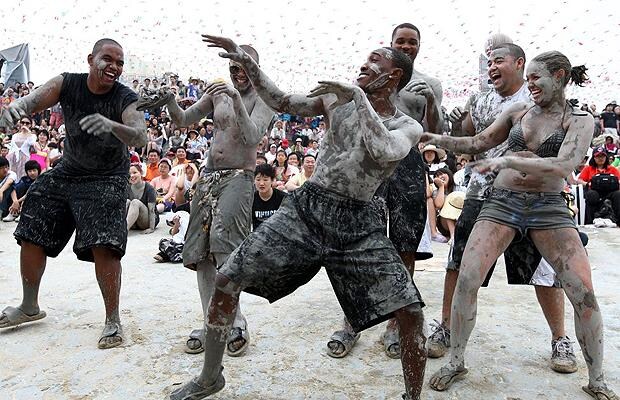
Food stands are lined up all around the Boryeong Mud Festival to satisfy one’s hunger. Mud beauty products and souvenirs are sold as well. Colored mud face paintings, a sea-side mini water park, and family zones are offered to accommodate the younger crowds. Mini Daecheon beach parades happen during the day, and at night the festival hosts a stage that features EDM by professional DJs on the beach.
The Boryeong Mud Festival offers a variety of programs ranging from mud baths, free mud-powder massages, mudflat games such as wrestling & football, and obstacle marathons. Not to mention, there is a water gun fight that breaks out randomly. This was probably my personal favorite part of the festival because everyone instantly became 12 years old again. It was simply, a blast.
Amber Ochoa is from Los Angeles, USA, and just recently moved to South Korea in May. She studied Biochemistry as an undergraduate. After graduation, she began venturing out and embracing her love for adventure. She finds that “nothing holds greater power in our life than the unknown.” One night while applying to random jobs on Indeed, she came across an English teaching position in Seoul, Korea. Flash forward, she is now teaching at CDI, Mokdong branch. She claims that Creverse found her and ended up becoming a blessing in disguise. Amber says giving knowledge to students & inspiring them for higher achievements in life is one of the greatest feelings in the world.
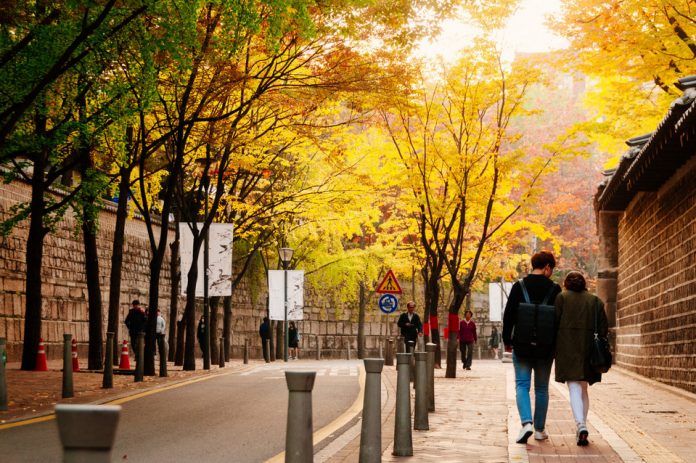
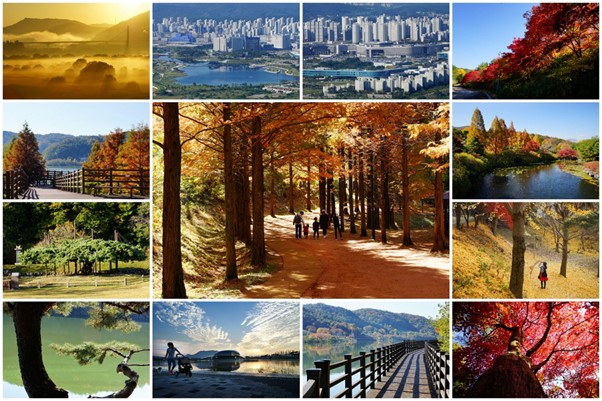
As summer ends and autumn arrives in South Korea, the country transforms with colorful beauty. Fall is a special time, especially for hikers, who can explore Korea’s natural splendor. If you’re lucky enough to be arriving during this season to teach English in Korea, you are in luck! From Seoul to Sejong, hiking through autumn landscapes can be a truly magical adventure!
Arriving to South Korea in the Fall feels like entering a painting. The air is cool, carrying the scent of crisp leaves and new adventures. The streets are warm and inviting, covered in red, orange, and yellow leaves, urging you to go outside.
Among Korea’s four seasons, Fall is a fan favorite. The hot summer eases into perfect weather conditions, perfect for outdoor activities. The colorful trees make hiking the perfect activity. The mix of colors on mountains and valleys is breathtaking, making fall a great time for photographersand nature-loversalike.
Hiking Though Korea's Autumn Glory
Korea has many hiking trails that become stunning in Fall. From the famoulsy popular Bukhansan National Park in Seoul to hidden gems around the country, each trail offers a unique experience. Trees turn into a beautiful mix of red, orange, and yellow as you climb. The rustling leaves and glimpses of wildlife make the journey enchanting.
Enjoying Fall in Sejong City
Sejong City, surrounded by hills and beautiful landscapes, is perfect for a peaceful fall hiking adventure. Trails like Bihak Mountain offer panoramic views of Sejong against autumn colors. The city’s bustling scene transitions to a calm natural setting as ascend up and down the mountain!
A Taste of Culture Along The Way
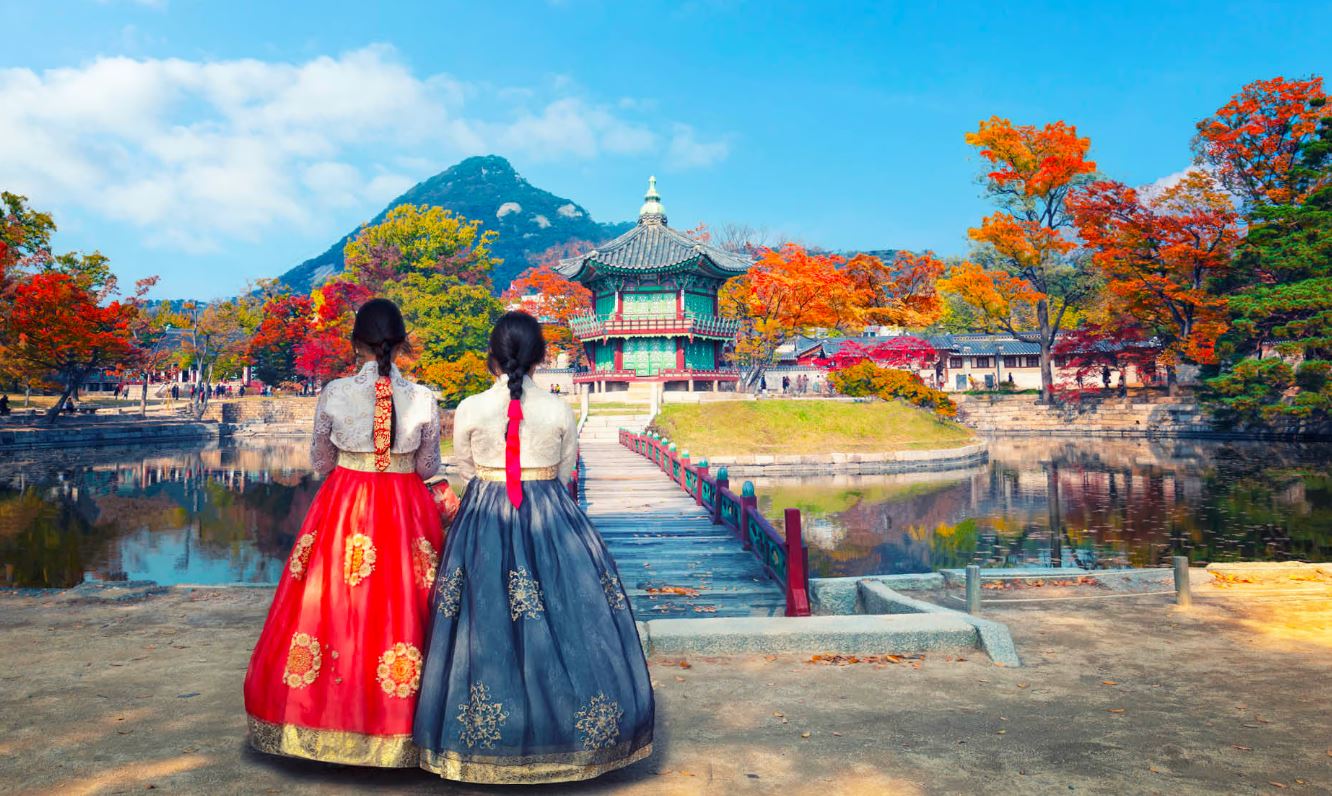
Fall in Korea isn’t just about nature; it’s also a time for culture and festivities. On the trails, you might see locals in traditional Korean attire, having picnics, or performing folk shows. These encounters show Korea’s rich culture and can make your hiking experiences even more fun and exciting.
Fall in Korea is a season of wonder, where nature displays its beauty through colorful landscapes. Experiencing Korea during this season is like taking a front-row seat to a fall symphony. From bustling city streets to peaceful country trails, each step celebrates Korea’s traditional and modern beauty. Strap on your hiking boots, feel the cool breeze, and let the adventure begin!
Bella Maselana hails from South Africa where she earned a Bachelor’s of Psychology and has served as an English teacher and Lecturer at the University of SA. Bella currently teaches at April English in Sejong, South Korea.
Eating kbbq, kimchi, bulgogi, and samgyeopsal never gets old while living in Korea. Although, from time to time I do miss the occasional cheeseburger, pizza, and street tacos. I can’t help it! I was born and raised in Los Angeles, California. Missing food from home is not unusual while living abroad. Thankfully, I’ve run into my fare share of restaurants that serve American food in Korea.
The Cheeseburgers Finds
If you are ever in the mood for a cheeseburger, you’ll be sure to find a McDonald’s or Burger King nearby. Are you worried about not being able to order because of your lack of Korean speaking skills? Not to worry! They have kiosks that you order from with English language settings. The prices are impeccable, as inflation is not a huge issue here in Korea (yet). For instance, you could purchase a whopper meal and spend about 10,000 KRW or $7.50 USD.
More “sophisticated” American food in Korea, Five Guys is also located in Gangam. Lines are usually out the door, so be sure to plan accordingly. The menu is a bit overpriced, but if you’re looking for a quality burger, this is the way to go. Now, if you’re looking for a burger that is absolutely chef’s kiss, Brooklyn burger joint takes the trophy. I go to the Mokdong location at least once a week. The patty is juicy, and the buns are soft, yet sturdy. The meat/bun/accompaniment ratio is even from the first to last bite. Not to mention, the milkshakes are thick, creamy, and smooth. The quality of the meal makes up for the price. You can expect to pay about 20,000 krw or $15.50 USD for a cheeseburger, milkshake, and fries. Be sure to check out this link for additional information on Brooklyn locations and menu.
"American" Pizza
The great news about American food in Korea: pizza parlors can be found on almost every corner. I was surprised to find Papa Johns my first week arriving here in Seoul. The menu is a bit different out here, as all places accommodate their audience. Garlic pepper steak, grilled bulgogi, and shrimp alfredo pizza are common in most Korean parlors. But, you can definitely still order your plain pepperoni and cheese pizza as well. Prices range depending on the size. The smallest size starts at 20,000 KRW. Be sure to click the link to see the official menu. Also, feel free to check out Foursquare’s top 15 best pizza places in Seoul.
American-style Mexican Food
According to google, Mexican food is Americans’ second favorite food. So, it’s only right that I include a section of this blog dedicated to the best kind of food on the planet (I am mexican, call me biased). Crazy enough, Koreans can cook up a decent burrito, taco, and quesadilla. Mexican restaurants are not the easiest finds. But, I have found that Itaewon has a handful of good spots. Some meals (other than the usual burrito/tacos/quesadillas) you’ll be able to order include enchiladas, super nachos, tamales, chilaquiles, and mole. Check the link below to see 10Magazine’s top 10 Mexican restaurants in Seoul for Mexican American Food in Korea.
Additional American Food Spots In Korea
Some other noteworthy American food spots in Korea include Subway, KFC, Starbucks, On The Border, Auntie Anne’s, Pancake House, and TGI Friday’s just to name a few! Mom’s touch actually originated here in South Korea. They’ve been branching out over the years, and actually have some locations in Los Angeles. If you are looking for a delicious chicken sandwich, be sure to check them out!
Amber Ochoa is from Los Angeles, USA, and just recently moved to
South Korea in May. She studied Biochemistry as an undergraduate. After
graduation, she began venturing out and began to embrace her love for
adventure. She finds that “nothing holds greater power in our life than the
unknown.” One night while applying to random jobs on Indeed, she came across an
English teaching position in Seoul, Korea. Flash forward, she is now teaching
at CDI, Mokdong branch. She claims that Creverse found her and ended up
becoming a blessing in disguise. Amber says giving knowledge to students &
inspiring them for higher achievements in life is one of the greatest feelings
in the world.
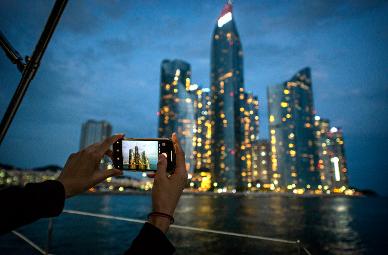
Hello everyone! My name is Sam, and I’m moving to Korea in August 2023 to teach English at the CREVERSE Guri Dasan April Institute. There are so many things I’m looking forward to! I can’t wait to explore Gyeongbok Palace in Seoul, and taking yacht cruise underneath the Gwanganri bridge in Busan at night. All whilst enjoying the extremely rewarding job of teaching English! Here are a couple of pics that are getting me more excited. But let me get back to the topic at hand! To teach in Korea, you need an E-2 teaching visa, and here are the step by step directions on the visa application process in the UK, after you receive your visa code.
Gyeongbokgung, also known as Gyeongbokgung Palace or Gyeongbok Palace, was the main royal palace of the Joseon dynasty. Built in 1395.
Luxury yacht tours have become popular in Busan over the last few years, where you can view waterfront landmarks such as Gwangan Bridge and Marine City.
A Quick Disclaimer
Everything I explain in this blog is a step-by-step guide on how I got through the visa application process in the U.K. I am only suggesting that you take a similar approach and hope to give you a clearer understanding through key websites, phone numbers, emails etc. that I used to tackle this process.
Also, everything I explain in this post is for people who are waiting for or have received their VISA code from CREVERSE.
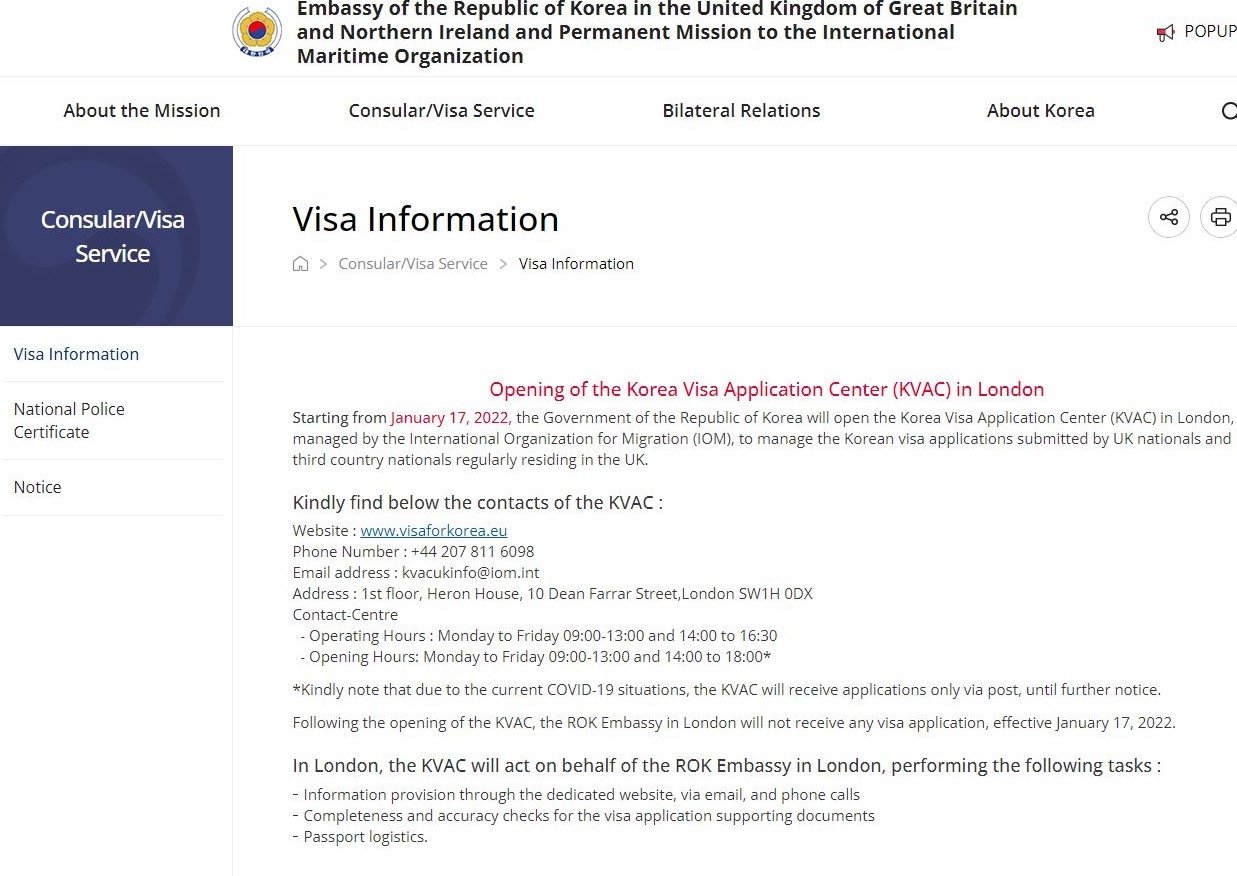
Visa & KVAC Important Links
The first thing I did was visit Korea’s Ministry of Foreign Affairs website which is a site you can use to find updates and guides on applying for Visas in Korea. You can use the website to find key contact information for KVAC, whom I decided to call. I wanted to ask to check what documents were needed and they directed me to the Korean Visa Application Center website.
It’s a good idea for you to call them to make sure that you don’t need any additional documents—based on your nationality, or any other personal circumstances.
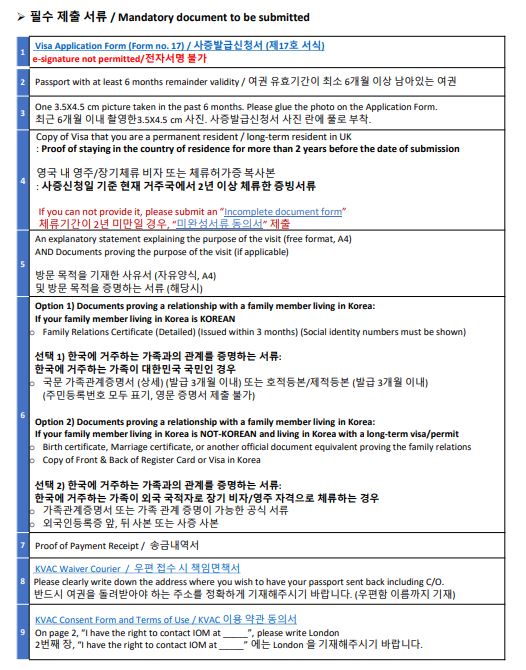
I was still confused though, as this guide didn’t include the documents needed or other important details. So, you can find this information here, and if you scroll down to the E2-1 visa you can see all of the required documents. When you go through this link, make sure to also download the forms they ask you to fill out as they will be important for your application.
Finally, you can see another link on the picture above, where it says “Please check your visa fee here.”
If you click this you can see the fees for your visa according to your nationality. So please check this link and you will know exactly what you owe when you pay for your visa.
Make sure you have followed my important links section and filled out all the required documents so you’re ready for the visa process. KVAC also ask for an extra piece of paper with your address and contact details in Korea. I personally contacted my recruiter who then provided me with the relevant details. On this extra paper I also wrote them a note saying what I have attached inside the envelope and that I look forward to their response. It gives your application a professional touch.
Calculate your visa fees. If you’re British that should be 60+180+15 (255 Euros). I recommend adding the 15 Euro Courier fee so that they will send your passport and visa back to you. (It is in Euros because they deal with their embassy in Germany. All your documents therefore initially go to London and then to Germany.)
Follow the instructions to send your money to their international account. Most Banks allow for international transactions for a small fee (Natwest charged me only 15p.)
Then you should email them at kvacukinfo@iom.int making sure your email subject reads like this: Your full name/ E2-1 / Proof of Payment.
Then send this email with the following details:
Name of nationality
Visa type (E2-1)
Write your payment details broken down – visa service fee 60 / Visa fee 180 / Courier Fee 15.
Attach a receipt of your payment transaction.
Step-by-Step Guide Part 2
After you send this email, then you shouldsend your documents to the KVAC London addressthat is provided in the guide. You don’t have to wait for their confirmationbut send it two to three days after your email.Make sure you send your real passport too. I recommendgetting the most secure first class trackingyou can get from your local post office – mine offers good compensation if my documents were to be lost, plus I could track my delivery.
Make sure to add your return details on the outside of the parcel, Your Name, Address and visa category.
After you have done all of this, wait until KVAC contact you to say your documents are all okay. They will then promptly forward them to Germany. After that you can track the process on the link they provide in their guide:https://www.visa.go.kr/main/openMain.do.
If you paid for their return courier service, they will then send back your printed off visa + passport. The whole process from sending your documents to London should take around 2 weeks, but this is subject to change.
Note that if you don’t pay the courier service, you can organise to collect your documents in London. See the guide from earlier to see how this is possible.
Please be sure to read the ENTIRE guide and thoroughly check every link and your documents so you are sure what you are doing.
Conclusions
Thank you for reading my blog on the visa application process in the U.K. with KVAC. I hope it was helpful. I wish you all the best of luck with your visa, and most importantly, I hope your experience in Korea will be as special as mine has been for me so far! 감사드립니다!!!
Sam Pearce is from Manchester, United Kingdom and graduated from Liverpool Hope University in 2019 with an undergraduate degree in History. However, since graduating he has become interested in the education industry! This has taken him to Sri Lanka, Italy and South Korea. Now he is planning to return to South Korea as a Creverse instructor in Dasan, Gyeonggi-do. Teaching English was a great decision for Sam, who not only loves benefiting children’s lives around the world positively, he can now also experience new cultures and learn about history in places that really interest him. Sam’s other interests include Karate (which he is a black belt in); playing football (he plays for a team in South Korea) and even going to the Norebang to do karaoke; amongst many other things.
If you’re about to embark on an exciting journey to South Korea to teach English, you’ve come to the right place. Before you dive headfirst into the land of K-pop and kimchi, let’s talk about the tools that will make your life much more convenient while you’re living your best expat life. These trusty apps will keep you connected, well-fed, and effortlessly navigating the streets of Seoul and beyond. Grab your phone as you read along so you can start downloading. Get ready to embrace convenience like a pro. Without further adieu, here are the 15 Must Have Apps for Korea!
(All links go to the Google Play Store, but all apps are also available for iOS)
COMMUNICATION
Kakao Talk
Kakao Talk is the one app that runs through the veins of every Korean. it is a must-have for anyone living in or visiting South Korea. From its seamless messaging to its cute sticker features and beyond, KakaoTalk has become an integral part of Korean social life. KakaoTalk is great for connecting with locals and will likely be the primary form of communication between you, your coworkers, and your friends. Pro tip: Make sure to choose a username that you are comfortable with, because the Kakao platform will only allow you to change it once!
MAPS & NAVIGATION
Kakao Maps
Lost in the streets of Seoul? Don’t expect your standard Google or Apple Maps to guide you well. Kakao Maps is here to save the day! This is the go-to navigation app for Koreans. Kakao Maps is an always reliable navigation tool. From accurate real-time directions to detailed public transportation information, this app is a game-changer. It has intuitive features, including voice-guided navigation and street view. It even recommends nearby attractions and restaurants.
Naver Maps
When it comes to map options, Naver Maps is my personal favorite (over Kakao Maps)! I find it to be incredibly intuitive, especially when it comes to providing directions for addresses submitted in English. Naver Maps offers a wealth of features. These include precise directions, real-time traffic updates, and comprehensive information about local attractions and services. It can show bus schedules, public transportation options, and user-generated reviews.
TRAVEL
Kakao Taxi
Kakao Taxi has become an indispensable app for Koreans. Other ride-hailing apps like Uber are NOT available, so if you need a ride quickly or aren’t yet comfortable with public transportation, Kakao Taxi has got you covered. It provides a seamless and efficient way to book a taxi right from your phone. This allows you to conveniently search the address right from your phone to avoid any communication errors with the driver about where to go. Kakao Taxi has real-time tracking, estimated fares, and the ability to choose your preferred vehicle type. (Be aware that you must have a functioning Korean phone number to connect a Korean bank card and pay, but you can always wave down a taxi the old fashioned way and pay with cash or any card!)
KTX
If you are looking to travel long distances in a short period of time, check out the KTX (Korea Train Express) and the KTX App by Korail. Get ready to speed across the country at trains reaching up to 300 kilometers per hour. All while enjoying the view, comfort, and amenities offered on board. With the KTX App by Korail, you can easily search for train schedules, reserve your preferred seats, and purchase e-tickets from your phone.
Trip.com
Navigating through various Korean apps and taking multiple screenshots can be tiring and potentially lead to travel mishaps. When I arrived in Korea, I found solace in using trip.com to book my KTX tickets to Seoul and other major cities. While the prices may be slightly higher compared to booking directly through Korean apps or ticket stands, it offers a great alternative for those seeking peace of mind. The app provides a clear understanding of the ticket purchasing process. Embrace the convenience of Trip.com for hassle-free ticket bookings during your Korean adventures!
TRANSLATION
Papago
Language barriers can be a hassle, but the Papago app revolutionizes communication in South Korea. This powerful translation app, developed by Naver, offers seamless translations between Korean and a multitude of languages. With features like text translation, voice recognition, and even image translation, Papago is a powerful tool for new arrivals and language learners alike.
Google Translate
Say 안녕하세요 (annyeonghaseyo) to Google Translate! Just like Papago, this app is equipped with text input, voice recognition, and offline capabilities to support you even when you’re offline. I think what sets Google Translate apart is its impressive real-time translation feature, which allows you to conveniently translate text on your screen using your phone’s camera.
SHOPPING & PAYMENT
Coupang
Coupang offers an extensive range of products, all just a few taps away. With lightning-fast delivery, this tool is comparable to Amazon. Newcomers often worry about packing, but with the ability to order nearly anything from Coupang, you don’t need to worry so much about packing.
GMarket
GMarket is another great Korean e-commerce platform offering both local and international brands. It always has deals and promotions, offering great value for your money. GMarket is a great option for new arrivals, as you will need a Korean bank account in order to set up any Coupang orders. On the other hand, GMarket allows you to pay with international cards.
Kakao Pay
I’m sure you’ve started to notice a recurring theme with the ubiquitous presence of “Kakao” on this list. Enter Kakao Pay, the digital payment revolutionizing how Koreans manage their finances. Whether you’re enjoying an iced americano at your go-to local café or seamlessly splitting bills with friends, this app provides a secure and convenient solution with just a few taps on your phone. With features like mobile payments, money transfers, and even the opportunity to earn rewards, Kakao Pay has it all. Plus, it’s as simple as a tap to make contactless payments straight from your phone using compatible card readers.
FOOD DELIVERY
CoupangEats, Yogiyo, & Baemin
Arguably some of the most important apps to download are Yogiyo (요기요), Baemin (배민), and Coupang Eats (쿠팡이츠) South Korea’s top food delivery apps! These apps offer an extensive range of options, from local favorites to international dishes. The apps are equipped with photos and descriptions, and the speed of Korean food delivery service is always impressive.
Help Me Emmo!
This option was my saving grace upon arriving to Korea! Ordering from the Korean apps can be tiresome when English descriptions aren’t available. HelpMeEmo (‘Emo’ means ‘Aunt’ in Korean) allows you to chat with a bilingual representative who can assist with placing delivery orders. You can customize your order, ask questions about the menu, and make special requests for just a small fee of around three dollars. And the first order is free! You can also message them on KakaoTalk at ‘HelpMeEmo.’
I hope you’ve found a few helpful apps and services that will make your life in South Korea more convenient and enjoyable! From translation and shopping to navigation and food delivery, these tools are here to simplify your life. Enjoy your adventures in South Korea with these essential apps by your side. Safe travels!
Alexandra Skourasis from Pennsylvania, USA, and has been living in South Korea since April 2021. She studied Biology and Spanish during college but decided to embrace her love of travel and cultural diversity through teaching English in other countries. After spending one year teaching in Madrid, Spain, she decided to move to South Korea, and since then has been teaching Chungdahm April in Sejong. Her favorite part about teaching is connecting with students and seeing how much growth they can achieve in just a short period of time. Alexandra describes her Korean life as the perfect mix of comfortable and exciting, and is passionate about encouraging other people to take the leap of faith and try something new.
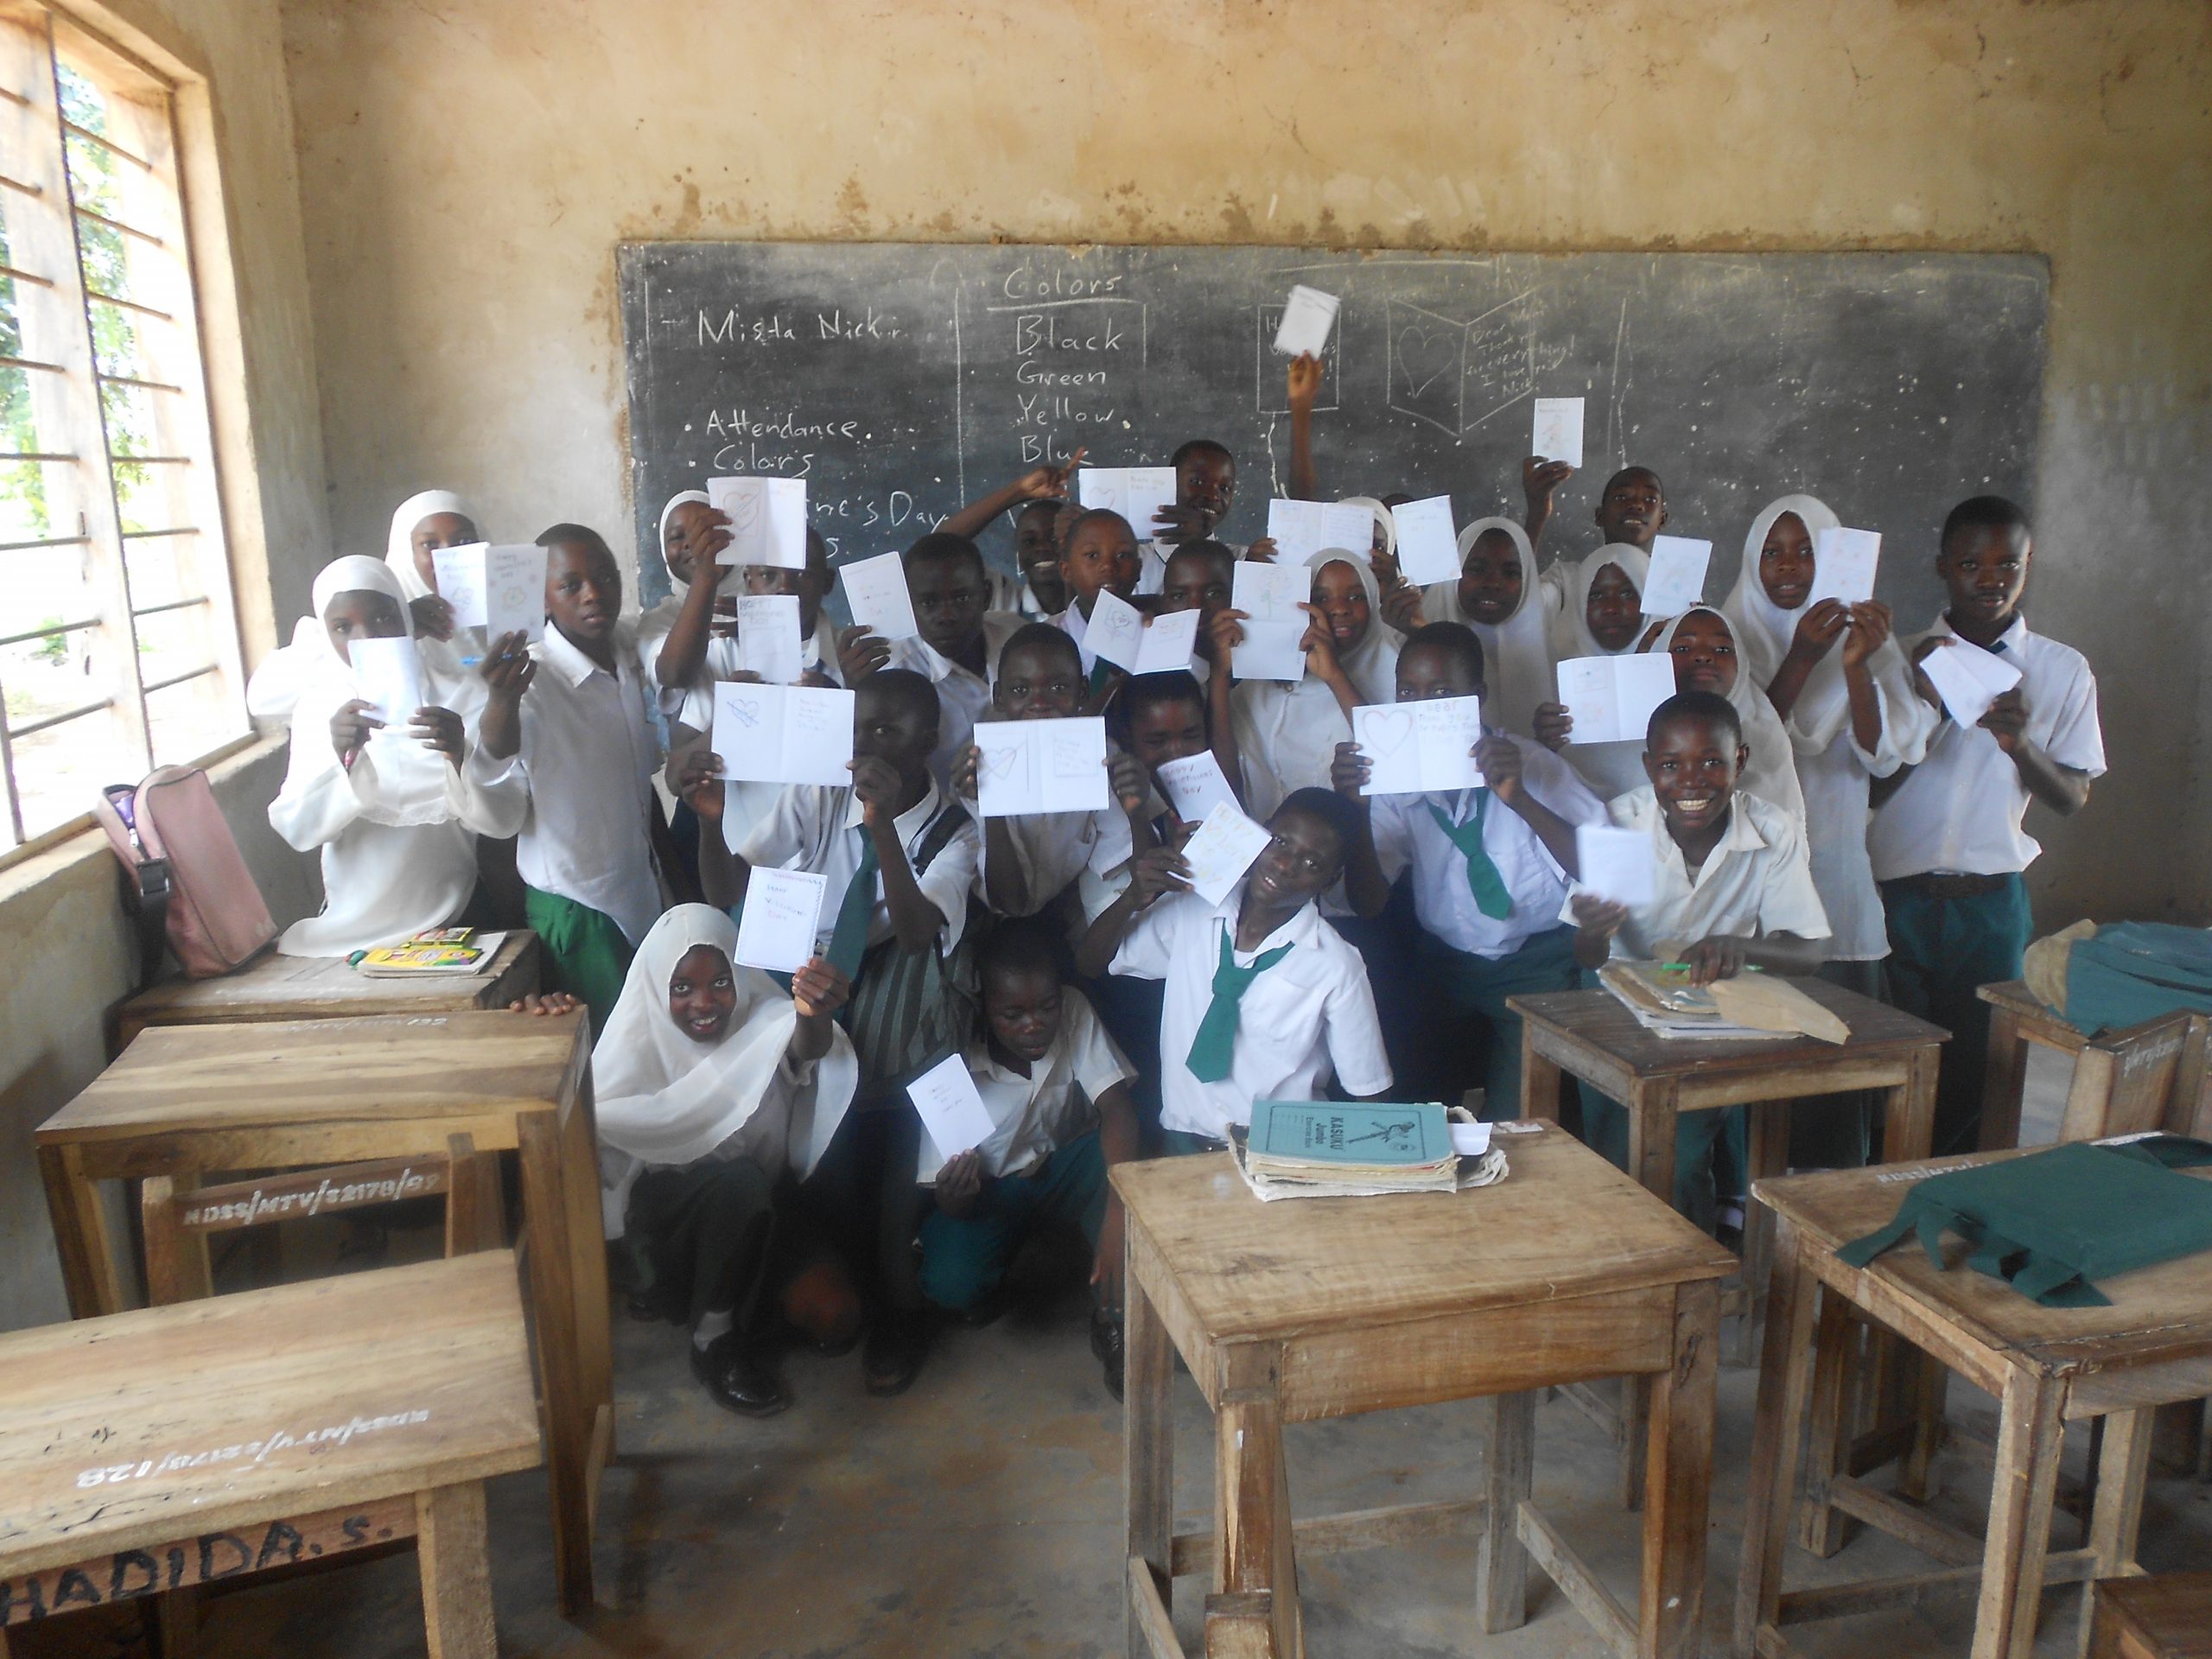
Before getting caught up in the daily grind of the working world, I decided it was the perfect time to become a Peace Corps volunteer. After graduating university with a degree in engineering, I was placed in Tanzania as a Math and Physics teacher. I loved teaching more than I ever thought I would. I felt such a strong connection with the students, and extended an extra year and a half to see my first students graduate from high school.
At the end of my service, I decided it was time to learn a new language and experience another new country. I packed up and moved to Korea. Fast forward a few years, and I found out about CREVERSE.
It was much easier being in the country and knowing the language. In addition, the recruiter and staff at the branch I worked with were very supportive with the housing and visa process. I feel like there was much less hand-holding than when I applied to the Peace Corps. That being said, it was also a much simpler process to apply for CREVERSE.
The Curriculum
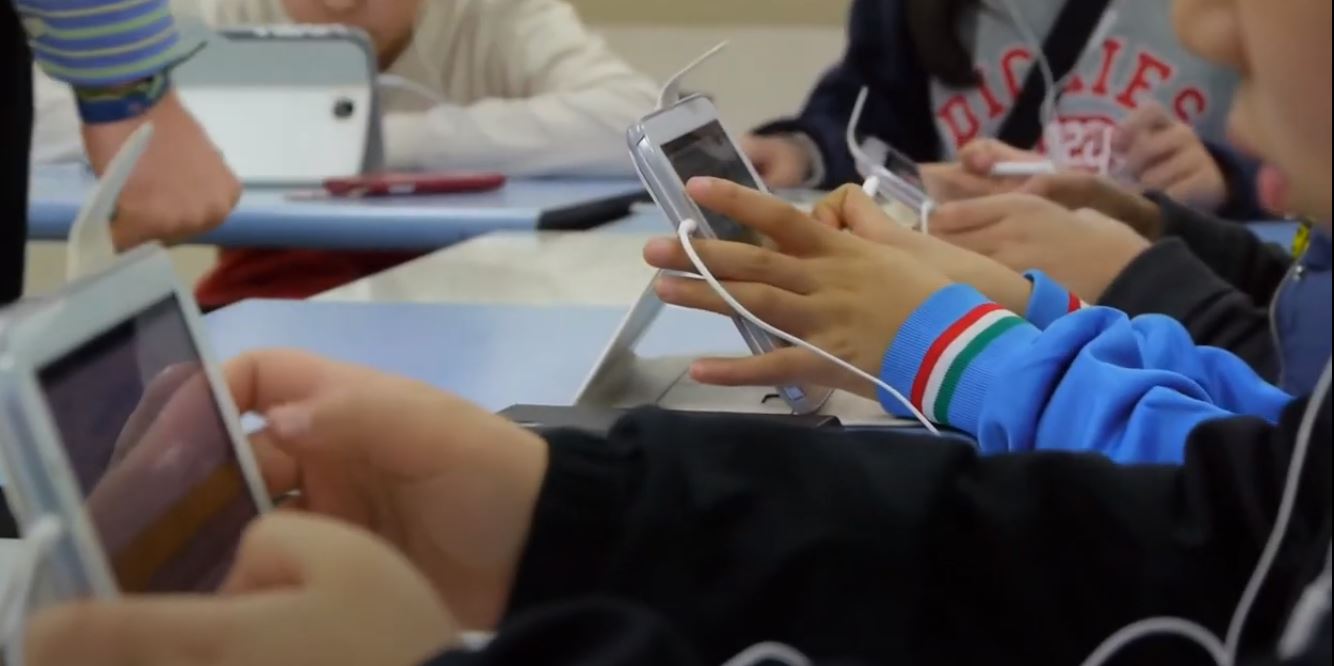
I’ve been very impressed with the materials we use in the classroom, and they are continuously making improvements and updates. This is the first time I’ve used a smart textbook. The students and teacher all use electronic tablets to more personally experience classes and interact with each other and the material. It feels like a great way to escape the rote learning that seems to pervade so many facets of education. There is a set curriculum for each module, so the teacher’s task is made easy. Steps and guidelines are all set out.
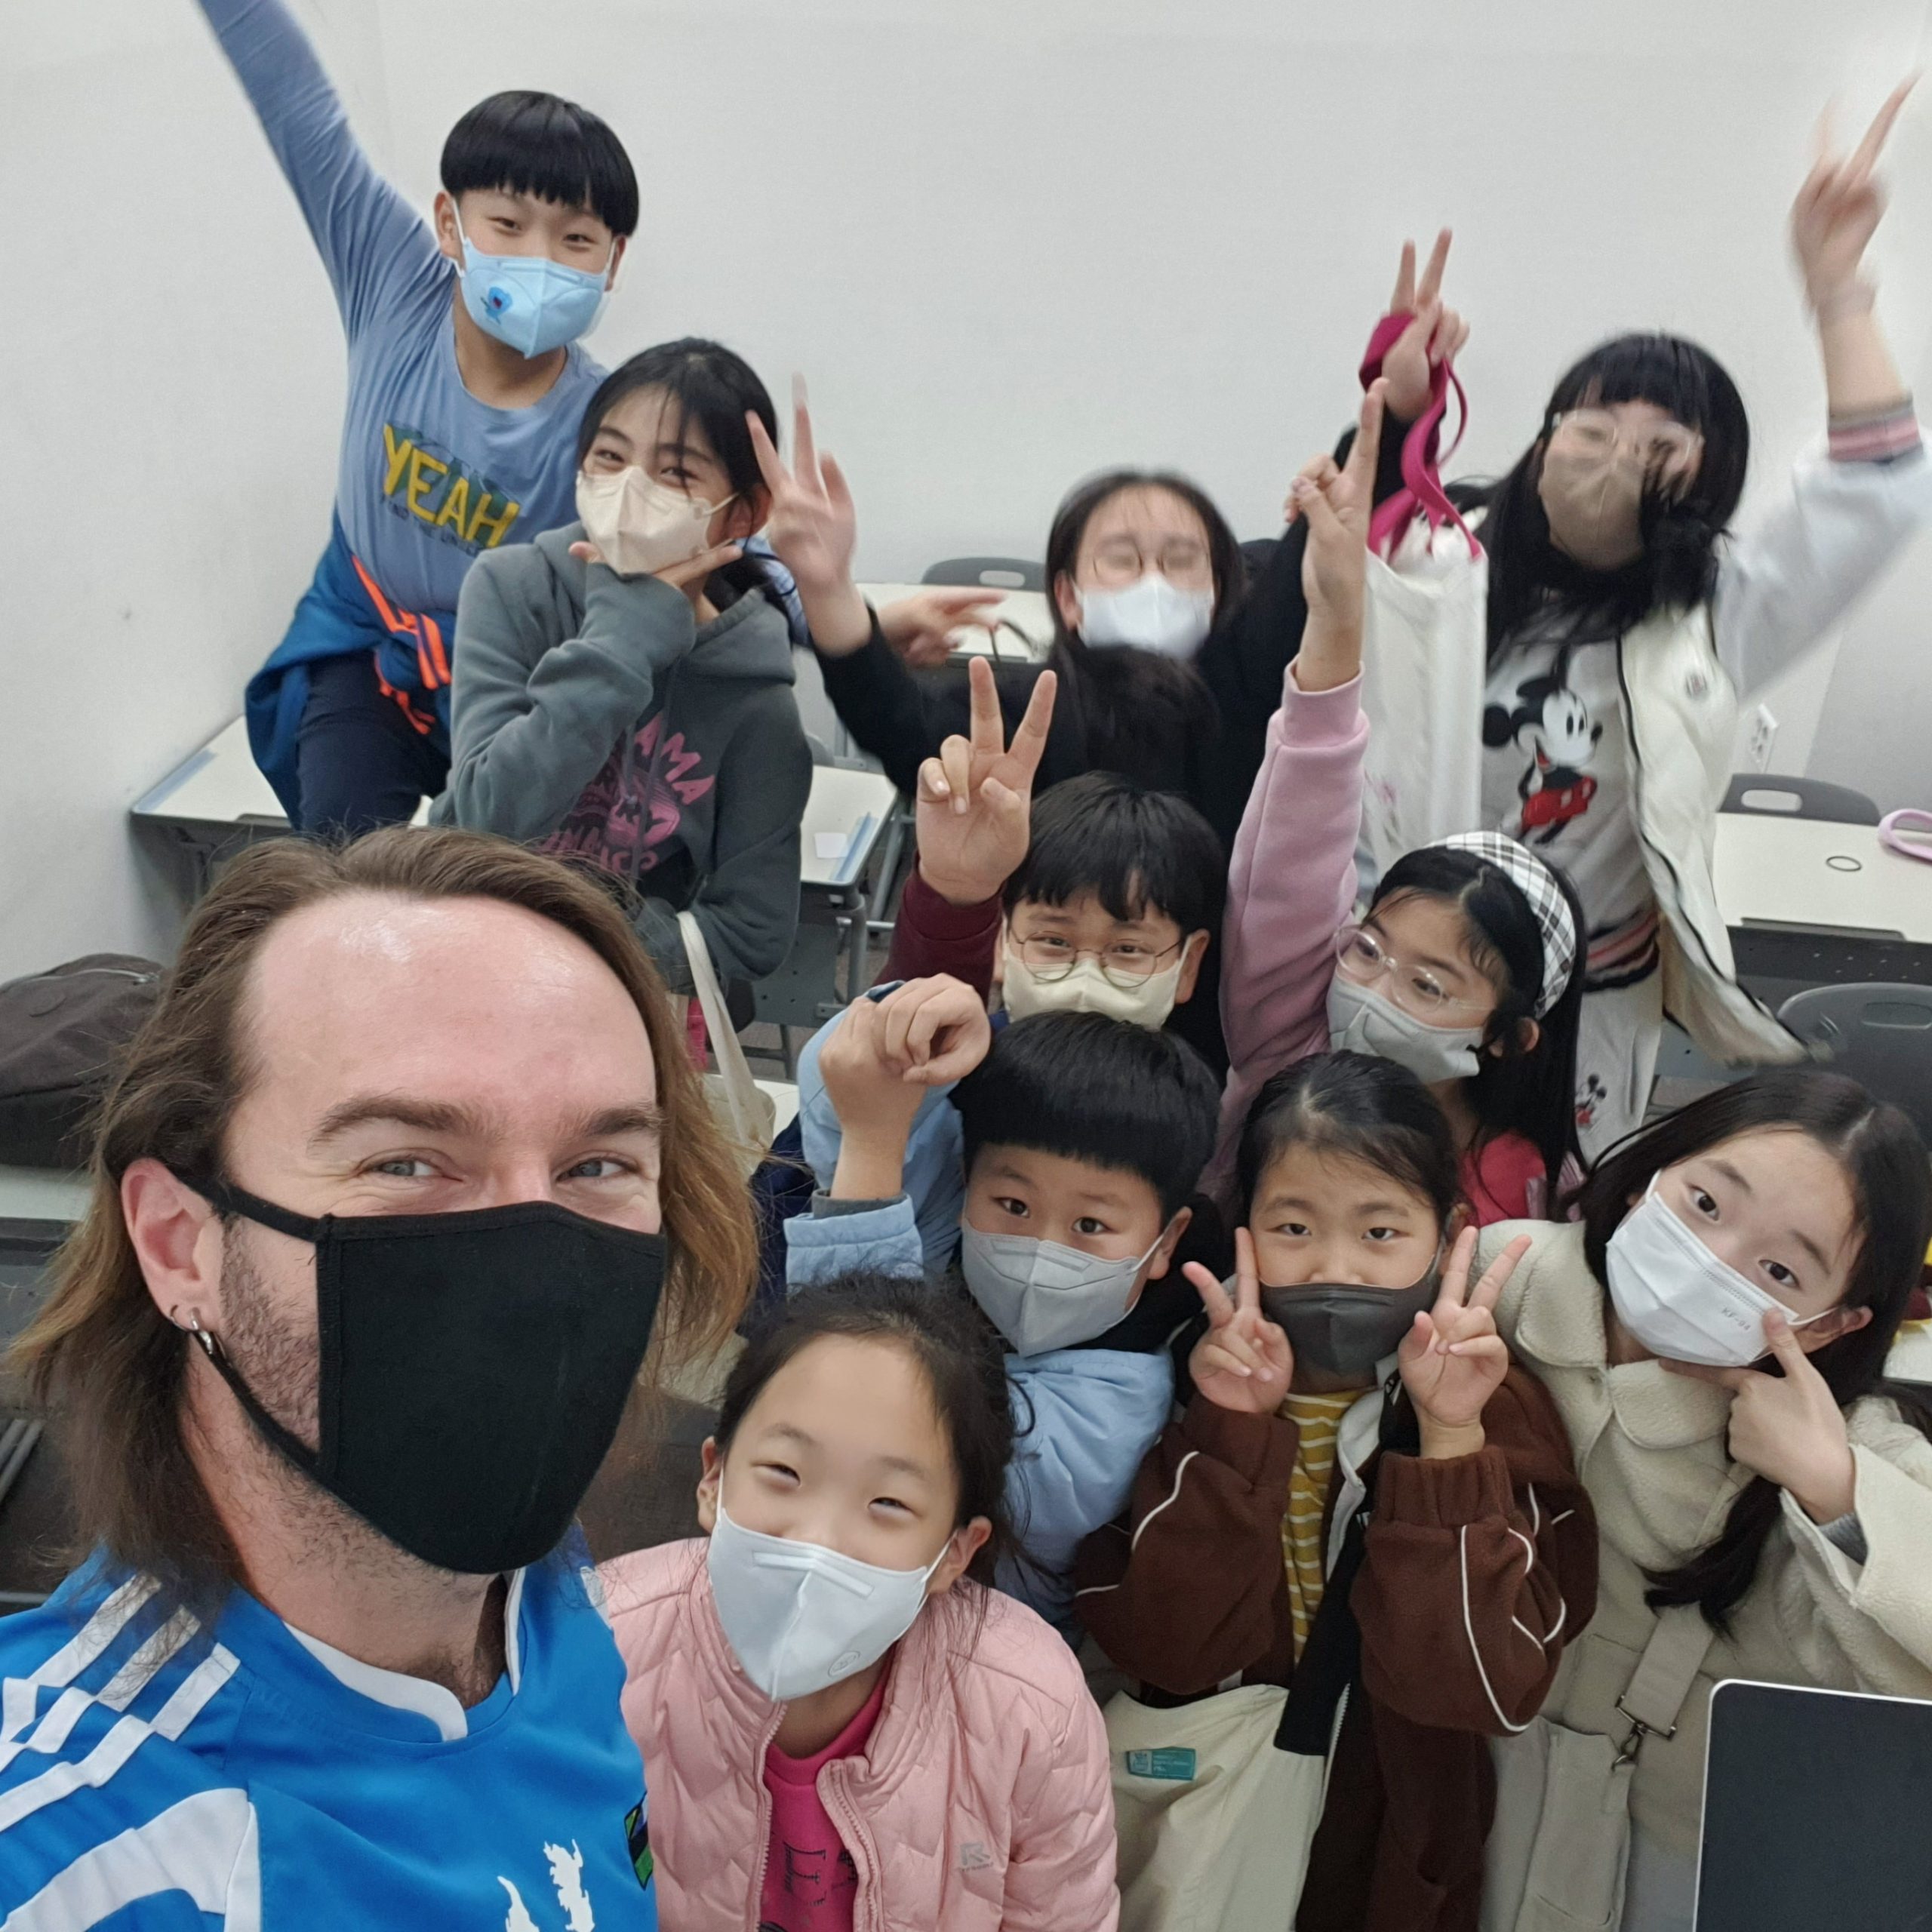
The Students
Obviously, the best part of teaching is the students. CREVERSE is no exception. Of course, just like any job or position anywhere, there will be not-so-good days where things don’t go the way you hoped or expected. But coming to work every day and seeing the smiles and hearing the greetings of students who are genuinely happy to see you is one of the best feelings in the world.
The Life
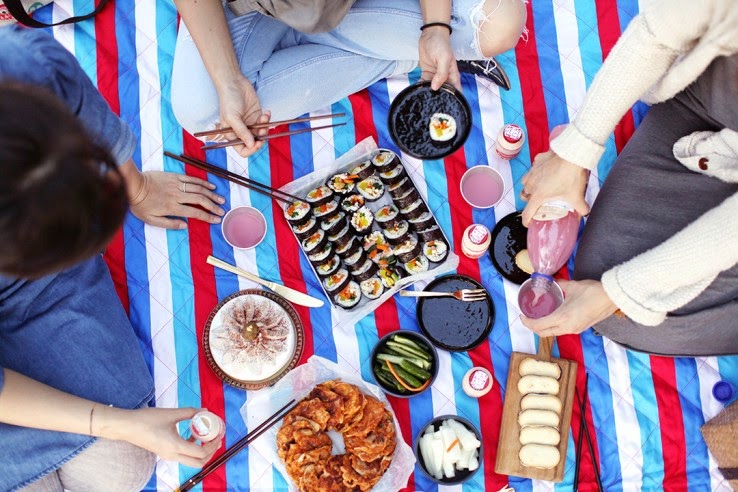
If you’ve discovered a love for teaching as a Peace Corps volunteer and are looking for a change of pace in a new country, Korea is an amazing place. There are countless opportunities to get out and explore this beautiful and historic country. CREVERSE’s teaching hours make it easy to get out before or after work. Try taking Korean lessons, join a dance class, or adventure on your own. Weekends are great for bus trips around the country or hiking trips up the many mountains. Many of the mountains are right in the middle of cities. Or, spend some down time picnicking by the Han River. The possibilities are endless!
Nick Allen Tayloris an RPCV (Returned Peace Corps Volunteer) who spent 3.5 years in Tanzania. He has a BS in Mechanical Engineering and a BA in International Relations from Oregon State University. He has lived in Korea for over 7 years, 3 of which he’s spent as an English Instructor at CREVERSE.